Like this article? Read more like it!
Featured
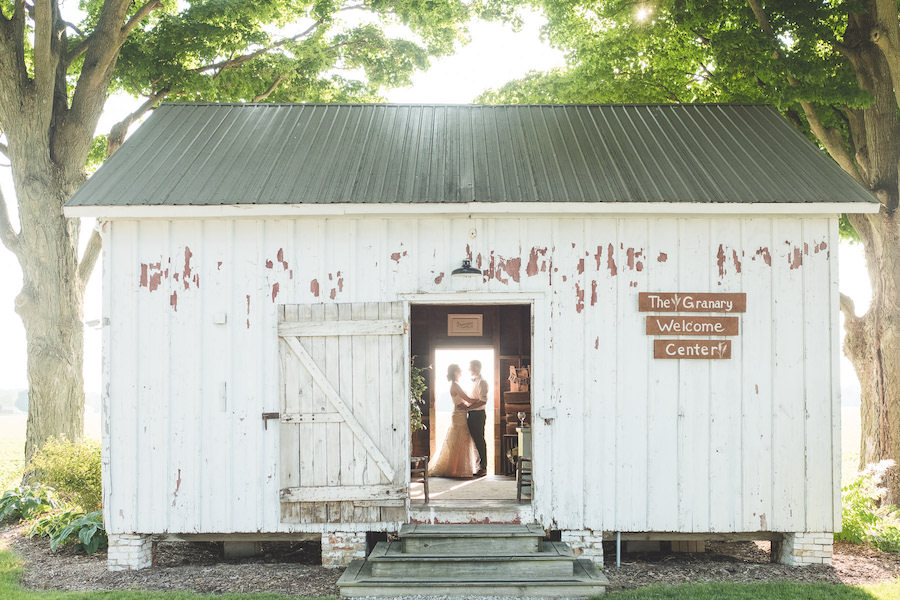
BASE TO DUPLICATE
Your Custom Text Here

Delivering images to clients can be a daunting task. Especially if you want to make a great impression, while keeping your workflow efficient and organized. With the right tools, it is possible to present your work in a way that is both aesthetically pleasing and practical. In this article, I will break down the full process of delivering wedding images to clients that goes beyond Google Drive or Dropbox and offer some insider tips to help you earn extra money too.
In the modern world of photography, ensuring clients have their photos in a timely and quality manner is essential. Professional photographers understand that sending out photos to clients is part of the job and are looking for solutions to make this process more efficient.
There are many options for photographers to deliver photos to wedding clients. From Pixieset, Pass, Shootproof, Smugmug and more. CloudSpot is the choice of many professional photographers including myself. Offering an intuitive and user-friendly platform that makes it easy to deliver wedding photos and other images to clients quickly and securely while still maintaining the high level of quality your clients expect. Sending your clients their photos is important not only for customer satisfaction but also for future business.
Export and Prep your Images
Upload Photos to your Client Gallery System
Customize your Clients Gallery
Choose your Delivery Method
Set up your Print Store
Create a Coupon Code for your Clients
Send your Clients their Gallery and Download Link
How many photos should a wedding photographer deliver to their client? Short answer between 100-120 images per hour of shooting. If you shoot an 8 hour wedding expect to deliver between 800 and 1000 images. Let’s prepare our photos so they are in the right format and ready for our clients.
PROTIP:My export settings for wedding images is 4000px on the long edge in SRGB color in JPG format at 70% quality. These settings will ensure your clients photos look great on most devices and keep the file size small while still being able to print.

Lightroom Export Settings
These export settings for Lightroom offer the perfect blend of high image quality and small file size!
One your photos are exported its time to upload them to your Client Gallery System. Simply create a new gallery and upload! CloudSpot integrates with JPGMini to reduce the file size of your images without reducing the quality of your photos. This not only makes your CloudSpot storage go further but it makes for more manageable downloads for your clients too!
PROTIP: Once all the images are uploaded you can create separate folders for different parts of the day to make it easier for your clients to find the photo they are looking for, quick!
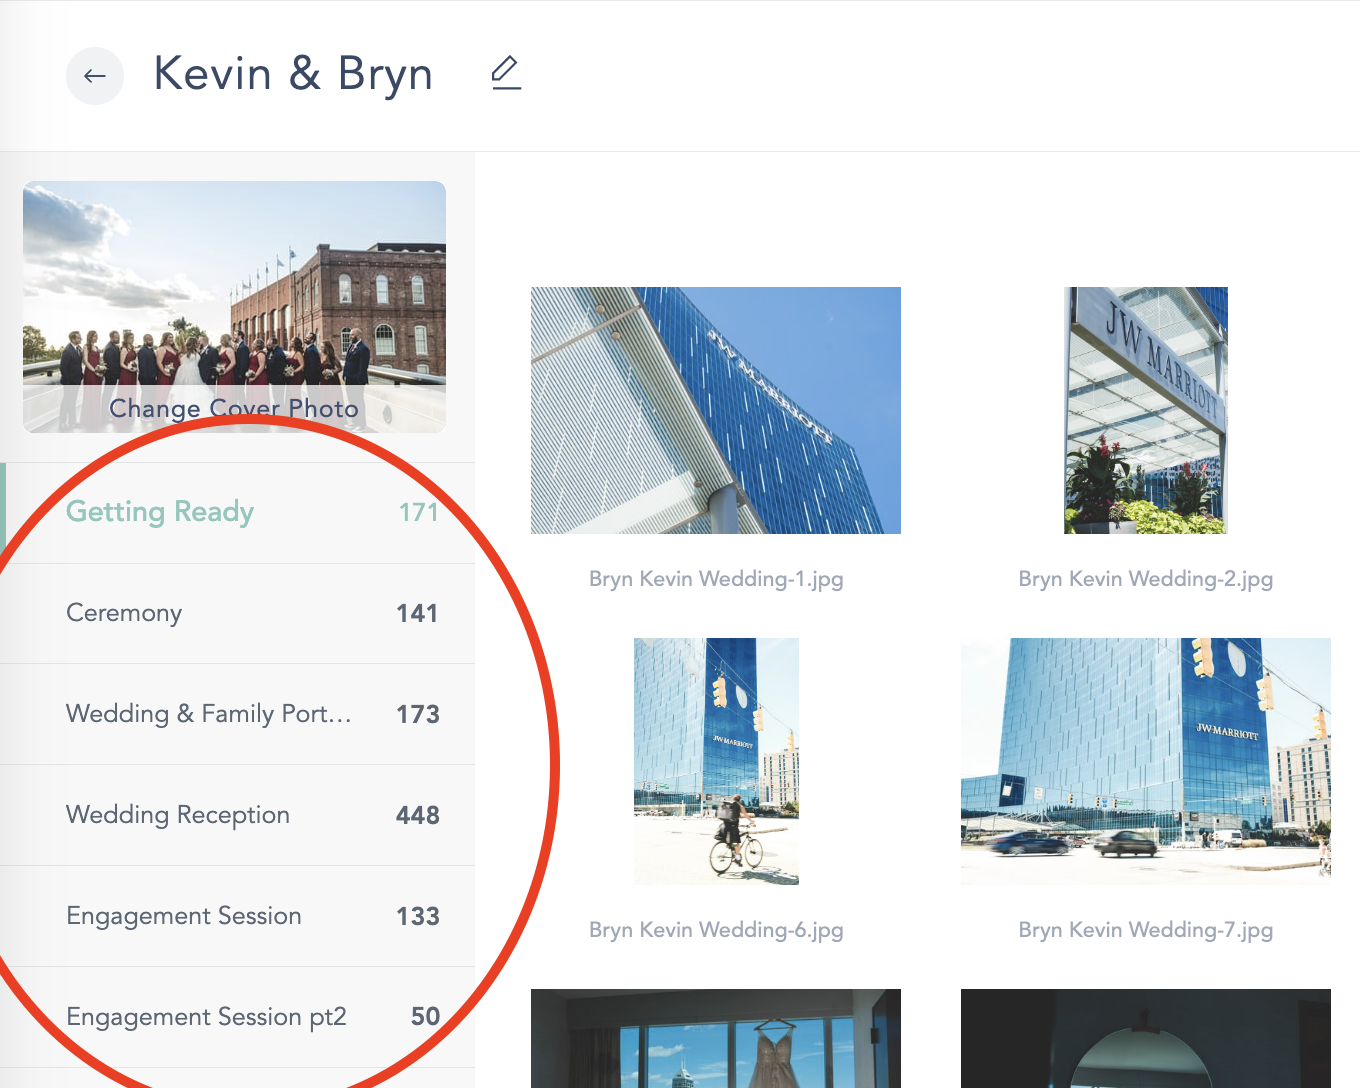
On top of delivering a gallery that looks more professional than Google Drive or Dropbox, CloudSpot allows you the ability to customize many aspects of the gallery experience for your clients. You can customize aspects like the layout of the whole gallery, the order in which images are shown, what photo you want to use on the cover of the gallery, who gets access to the gallery, and much more!

Choosing how your clients will get their photos is an important step in the deliver process. Most wedding couples will want to download all of their images as once. For some clients you will want them to make a selection of images. CloudSpot is the only client gallery system that allows your clients to download all of their photo from a zip file right in the email that you send. This makes your clients life easier.
PROTIP: If you want to protect your photos when sending them to clients with CloudSpot you can also choose to apply a watermark on images that are downloaded.

Every year I bring in additional revenue from the parents, grandparents, aunts and uncles of my wedding couples through my print store. Setting up your print store is easy with CloudSpot. From there, CloudSpot's built in Bulk Markup tool let's you profitably price your prints in just a second!
PROTIP: The most popular prints sold are 4x6, 5x7, and 8x10 so be sure to offer those print sizes.

One of the best ways to increase print sales is to offer a limited time coupon code to your couples when you send them their gallery. CloudSpot makes it easy to create quick coupon codes with expiration dates. Just make sure when pricing your prints to account for the discount so you can still be profitable.
PROTIP: Offering a 25% off coupon code that is good for 48 hours has given me the best luck in increasing sales after the wedding.

Once the gallery is all set up, it's time to send your clients their photos. You can send an email to your clients right within CloudSpot. And unlike any other client galley system, CloudSpot allows you to include the direct download link right in the email! That way they can keep all of their most important documents in just one place! Other client gallery systems force clients to log in and request a download which can take more than an hour at times before getting their download link.

In conclusion, if you are looking for a way to deliver wedding photos to clients, CloudSpot is an invaluable asset for photographers looking to provide the best client experience possible. Not only does it make it easy to upload, share and deliver images, but also provides a visually appealing, secure platform for clients to download their photos. It eliminates the hassle of multiple email threads and inconvenient file transfers. With CloudSpot, photographers are able to offer a seamless client experience that is simple and enjoyable. Clients can easily view, purchase and download their images with a few clicks of the mouse.

After 6 years I finally cut ties with Pixieset to move to CloudSpot to deliver my client photo galleries, and I couldn’t be happier. If you’re a photographer reading this blog it’s safe to assume you are thinking about doing the same thing. So here are 10 reasons I switched to CloudSpot from Pixieset.
What CloudSpot understands is that your photography is a service and not a product, and when it comes to providing a great service you have to deliver an experience the client will enjoy every step of the way. Even after the shoot. And I think we can all agree that delivering your photos via Google Drive or Dropbox is less than an exciting interface to receive photos.
It is important to know that with an online gallery, you are charged by how much storage you use and CloudSpot offers more storage in their free plan than Pixieset.
If you shoot 5 weddings and 10 engagements in a year you’d need about total 5gb of storage.
It is written in my contract that I hold photos for one year. That means you would need 10gb of storage minimum. Last years photos (5GB) Plus this years photos (5 more GB)
With CloudSpot's plan, it would cost you NOTHING! With Pixieset that same amount of hosting storage would cost you $8 a month. Save money and book more shoots, that's the key to grow your business!
Whats amazing is that CloudSpot has partnered with JPGmini to significantly reduces the file size of your photographs without affecting their perceptual quality. That means you need less storage to shoot more!
Then when it's time to upgrade, CloudSpot has several hosting plans that vary in the amount of storage they offer, including an unlimited plan perfect for pros who have a lot of images they need hosting!
For those just getting started, CloudSpot’s Free Forever plan is the perfect plan for you!
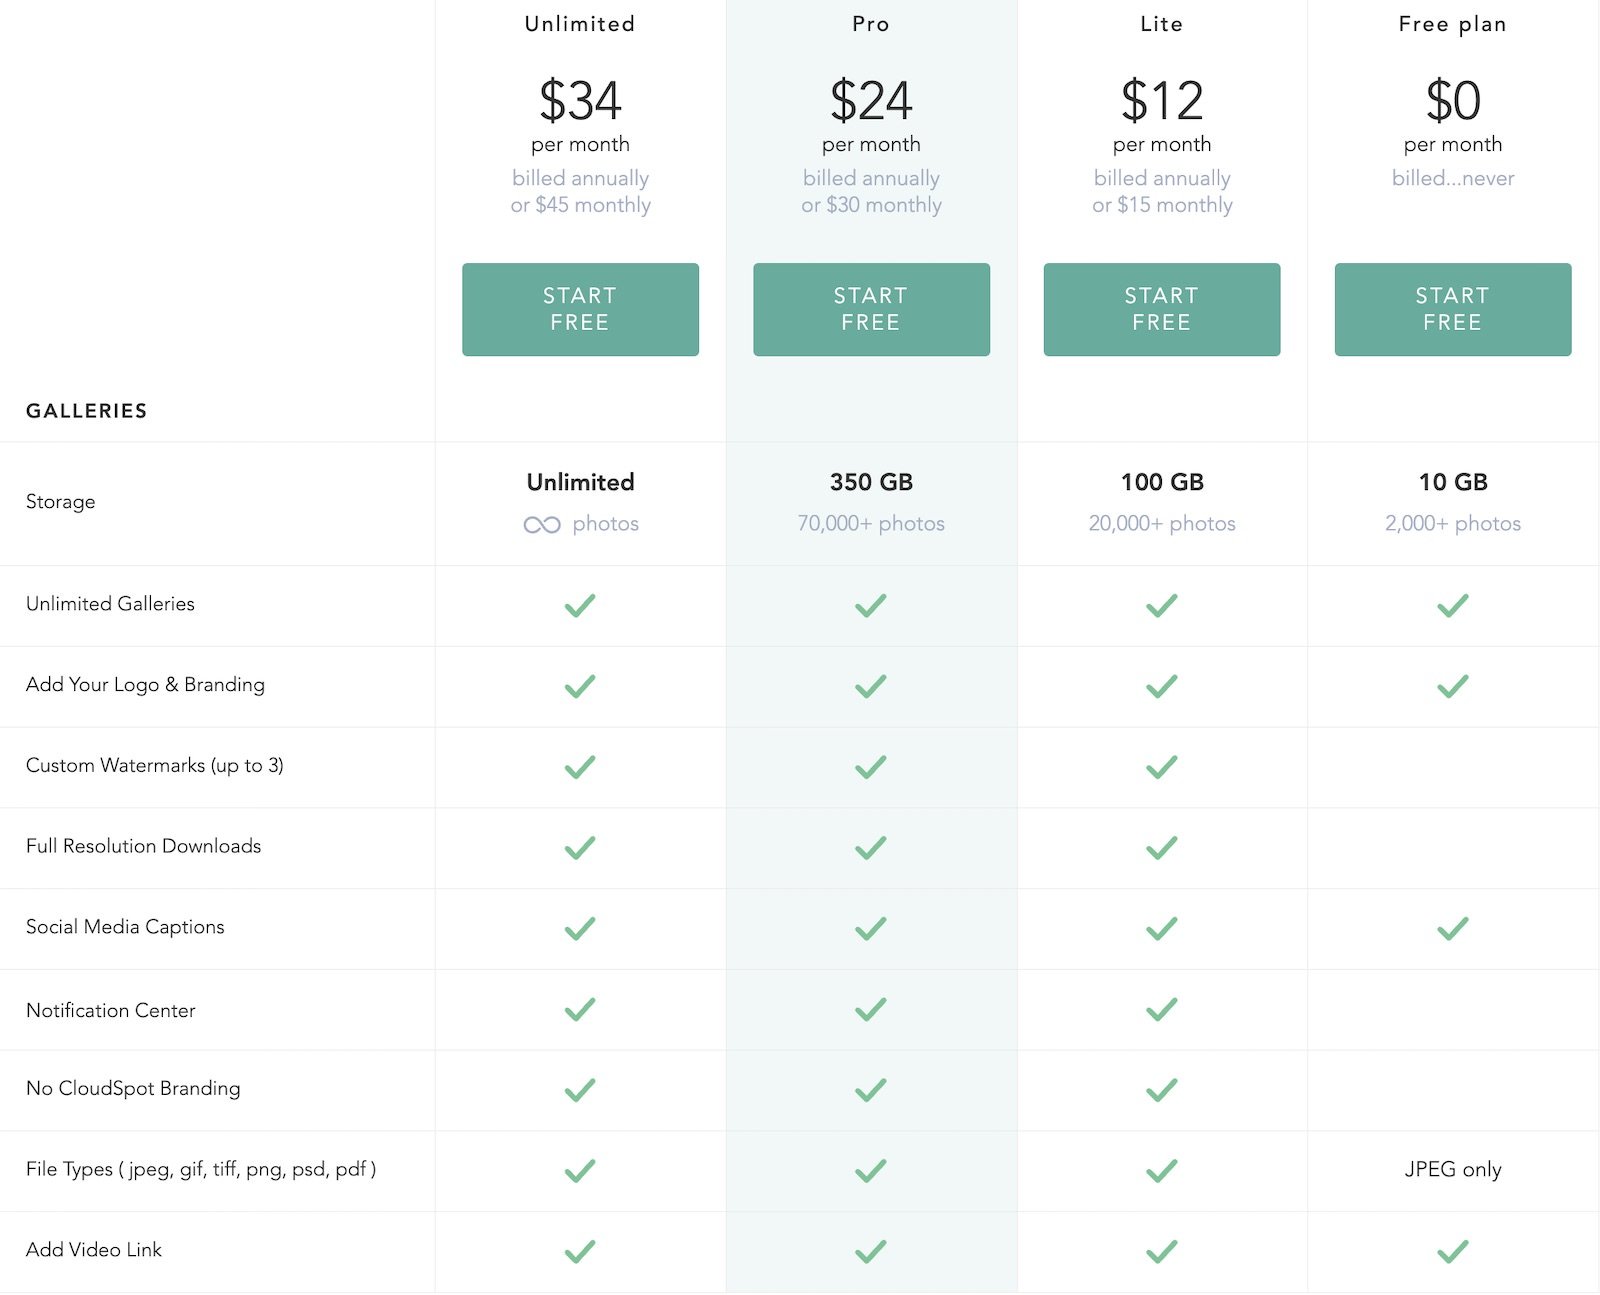
CloudSpot offers great storage options that grow with your new business
I’m a Wedding Photographer, not a videographer but that doesn’t stop me from taking my photos and turning them into a custom slideshow with Animoto to really wow my clients! (remember, photography is a service and this is a great form of marketing too!) Creating these slideshows in Animotos platform takes just 10 minutes and have been my biggest source of referrals. Unlike other photo gallery systems, CloudSpot allows you to not only showcase the video when proofing your images but allow your clients to download it too and share to social! This is the type of premium feature that you typically wouldn't get unless using one of the paid plans but remarkably, delivering video is also available in the free plan as well!
CloudSpot allows you to upload 7 popular file types including Gifs so you can share what you what with your clients, how you want!
www.RHatfieldPhotography.com
Florists, planners, bakers, venues all need photos too! When you share your photos with them they will be more likely to refer you to their clients in the future. With CloudSpot you can create a separate folder of images in your clients gallery that they will not see. That way you don’t have to use additional storage to upload the same photos to a separate gallery!
CloudSpot allows you to create unlimited galleries and from each collection. So upload your clients photos then create a private gallery just for the florist, one for the caterer, one for the venue, etc! Pixieset makes you create a separate gallery cutting into your available storage.

Florists, Planner, Venues, Bakery, DJ, all of these vendors love when you share photos with them showing off their talents. Cloudspot makes it easy!
Your clients want photos to enjoy. CloudSpot allows you to send your clients a link to their gallery that downloads an app right to their smartphone. That way they can access it anytime showing off your beautiful work to their friends and family.

Cloudspot lets you create an app from your client photo gallery in just one click!
CloudSpot makes the whole process a breeze! Upload your photos, send your client a link to their app! They are prompted with “grandma proof” instructions to install the app on their phone. On the backend, you can allow users to download their photos to their phones! And if that wasn’t cool enough you can enable watermarks on downloads! So your client can still have an incredible viewing experience but you can keep your photos protected!
Your clients can enjoy your photos in 1 of 3 ways. Digitally, as a Print, or in an Album. With CloudSpot you can give them all 3! One of the huge perks of CloudSpots Album Builder is that unlike other client gallery providers, your client can build their own album if they wish. Creating the perfect album for them while you still set the price and earn revenue!


I haven’t used this feature yet but I can see the potential and this. CloudSpot creates beautiful photo galleries, right? Well, they allow you to embed a gallery onto your own wordpress or squarespace website. Why do double the work to upload more photos to your site if you pay for CloudSpot to host photo galleries already!? If you are new to photography and your website isn’t quite where you want it to be yet, this will be a godsend. You can create a portfolio of images within CloudSpot, now you can embed that online photo gallery on the homepage of your website AND you can create a mobile app out of it to use when networking and showcasing your portfolio wherever an opportunity arises! Making 1 gallery do triple duty!
The more places you can share your photos to be found the better!
Just about every online photo gallery system has the ability to sell prints and set your own pricing. That’s basic stuff. Where CloudSpot shines is 3 fold.
#1 Embed your CloudSpot store on your website.
With the ability to embed your CloudSpot gallery on your site, that now means you can sell your photos directly from your site. No need to send them to a special link to a different domain and take additional steps. This is ideal for Landscape photographers, Fine Art photographers, and any other photographer who sells photos in small quantities and one-offs. Seriously integrating a sales system into your website is not intuitive or cheap! With CloudSpot it’s pretty and painless!

#2 Offer print sales within the gallery apps!
In my wedding photography business, the people who buy the most prints are parents who buy prints during the week between 9-5pm. My guess is because less and less do most people need a dedicated computer at home because their tablets do just fine. So they have to wait until they get to the computer at work to buy prints of their children’s wedding. I imagine that print sales within the mobile app will boost sales for not only parents but also grandparents who are even less likely to own a computer!
#3 Advanced industry first tools to help sell your photos.
From mockups to see what print sizes look like on different walls types to using your clients iPhone camera and Augmented Reality to show your client what different print sizes would look like in their own home so they can make the right choice for them! No one is doing that and when clients use it, they typically buy larger prints than they would have because they can see the impact they make!

It’s written in my contract that I will hold on to images for the couple for 1 year after the delivery date to keep my storage fees low. Having the ability for CloudSpot to automatically email those who have registered for a certain gallery to let them know it’s about to expire and include a coupon code to any last-minute prints and a reminder to download their photos before they are removed, simply means I no longer have to remember to do it and selling is done easy!

On top of that CloudSpot has advanced gallery analytics. This info lets you see at a glance how many times the gallery has been viewed, how many email address have been captured, how many images have been marked as favorites, who marked those photos as favorites and more! This insight can help you to create more profitable images and build a stronger business.
I love CloudSpot's built-in and automated print integration. When someone purchases a print from me, CloudSpot takes care of all the heavy lifting and I don't have to do anything, just collect my money. But there are some products like canvases I like to use an outside company for. In the past, you either had to choose to have all of your products auto or self fulfilled. Now you can have a hybrid option where select products, desk prints, metal prints, ect are auto fulfilled and others like canvases can be self fulfilled.
This is huge for photography business owners and CloudSpot is the only gallery service that has this integration. Zapier is an online automation tool that connects your apps and services. You can connect two or more apps to automate repetitive tasks without coding or relying on developers to build the integration.
For wedding and event photographers you can connect CloudSpot with ConvertKit or Mailchimp and automatically add new gallery visitors to your monthly newsletter! With over more than 3000+ integrations you can connect to CloudSpot with Zapier the possibilities to automate your business are almost endless! Here is an explainer video on how Zapier works with CloudSpot.
Since signing up for CloudSpot, one thing has become abundantly clear, they stand for something....
It is clear in everything CloudSpot does and implements that they are giving you, the photographer every advantage you can when it comes to really leaving a lasting impression on your clients. With the amount of features CloudSpot offers from Hosting, Selling, and Marketing CloudSpot understands to its core that you can turn the last impression into a LASTING impression.
And when you sign up for your free account you can get free gallery migration so you can cancel your Pixieset account as well as a free 1:1 demo with a CloudSpot team member who will show you around and help you set up your gallery and store just the way you like it!
TL;DR I believe that CloudSpot client photo gallery system is the best way to showcase, deliver, and sell your photos online. They have many features that the outdated Pixieset does not and they are always adding more features based on community input. If you want a Client Photo Gallery that makes your life easier, wows your clients, and can make you money, CloudSpot is the right choice for you. You can sign up for a free forever plan, no credit card required. Deliver a beautiful gallery to your client today!
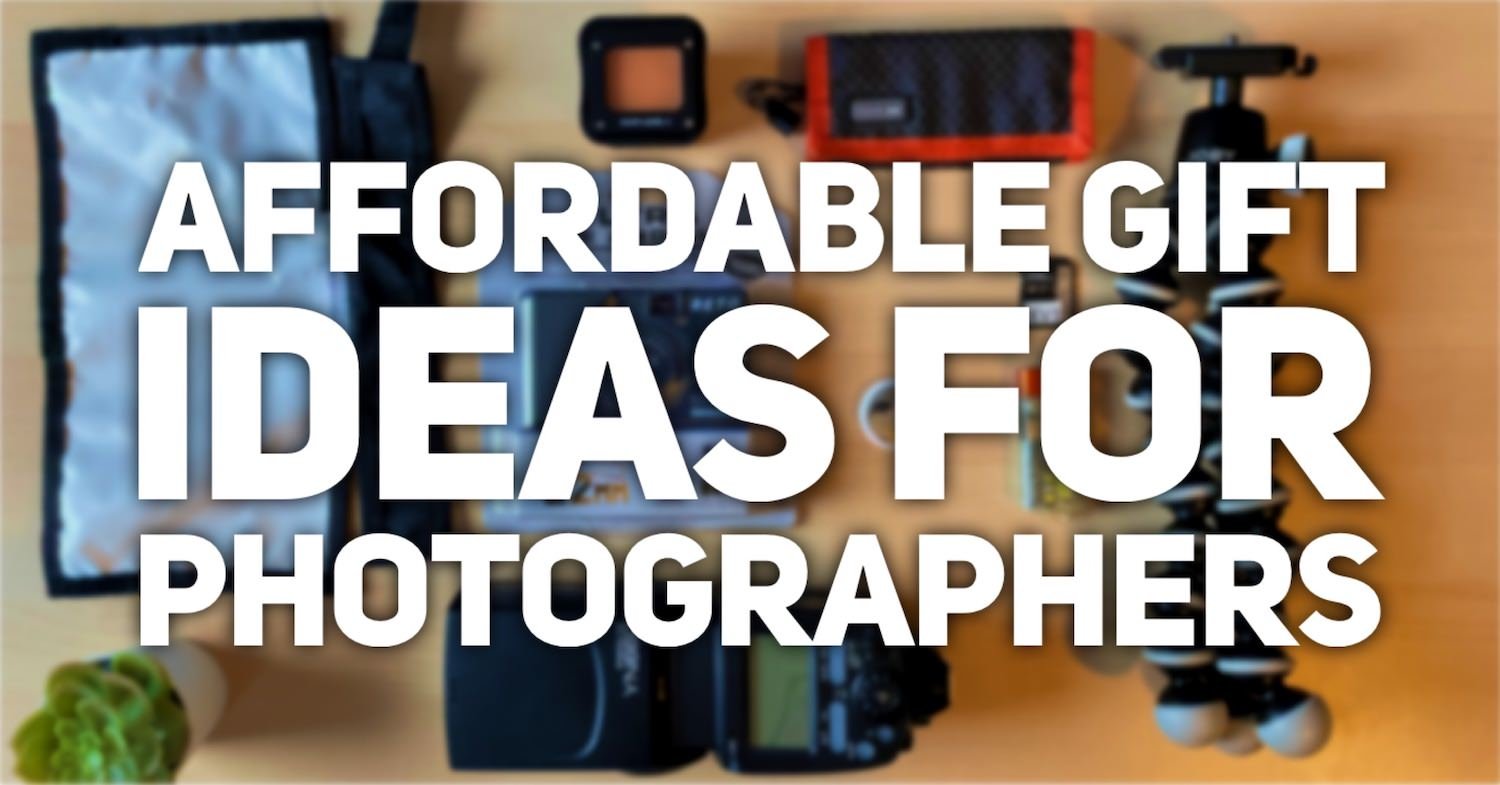
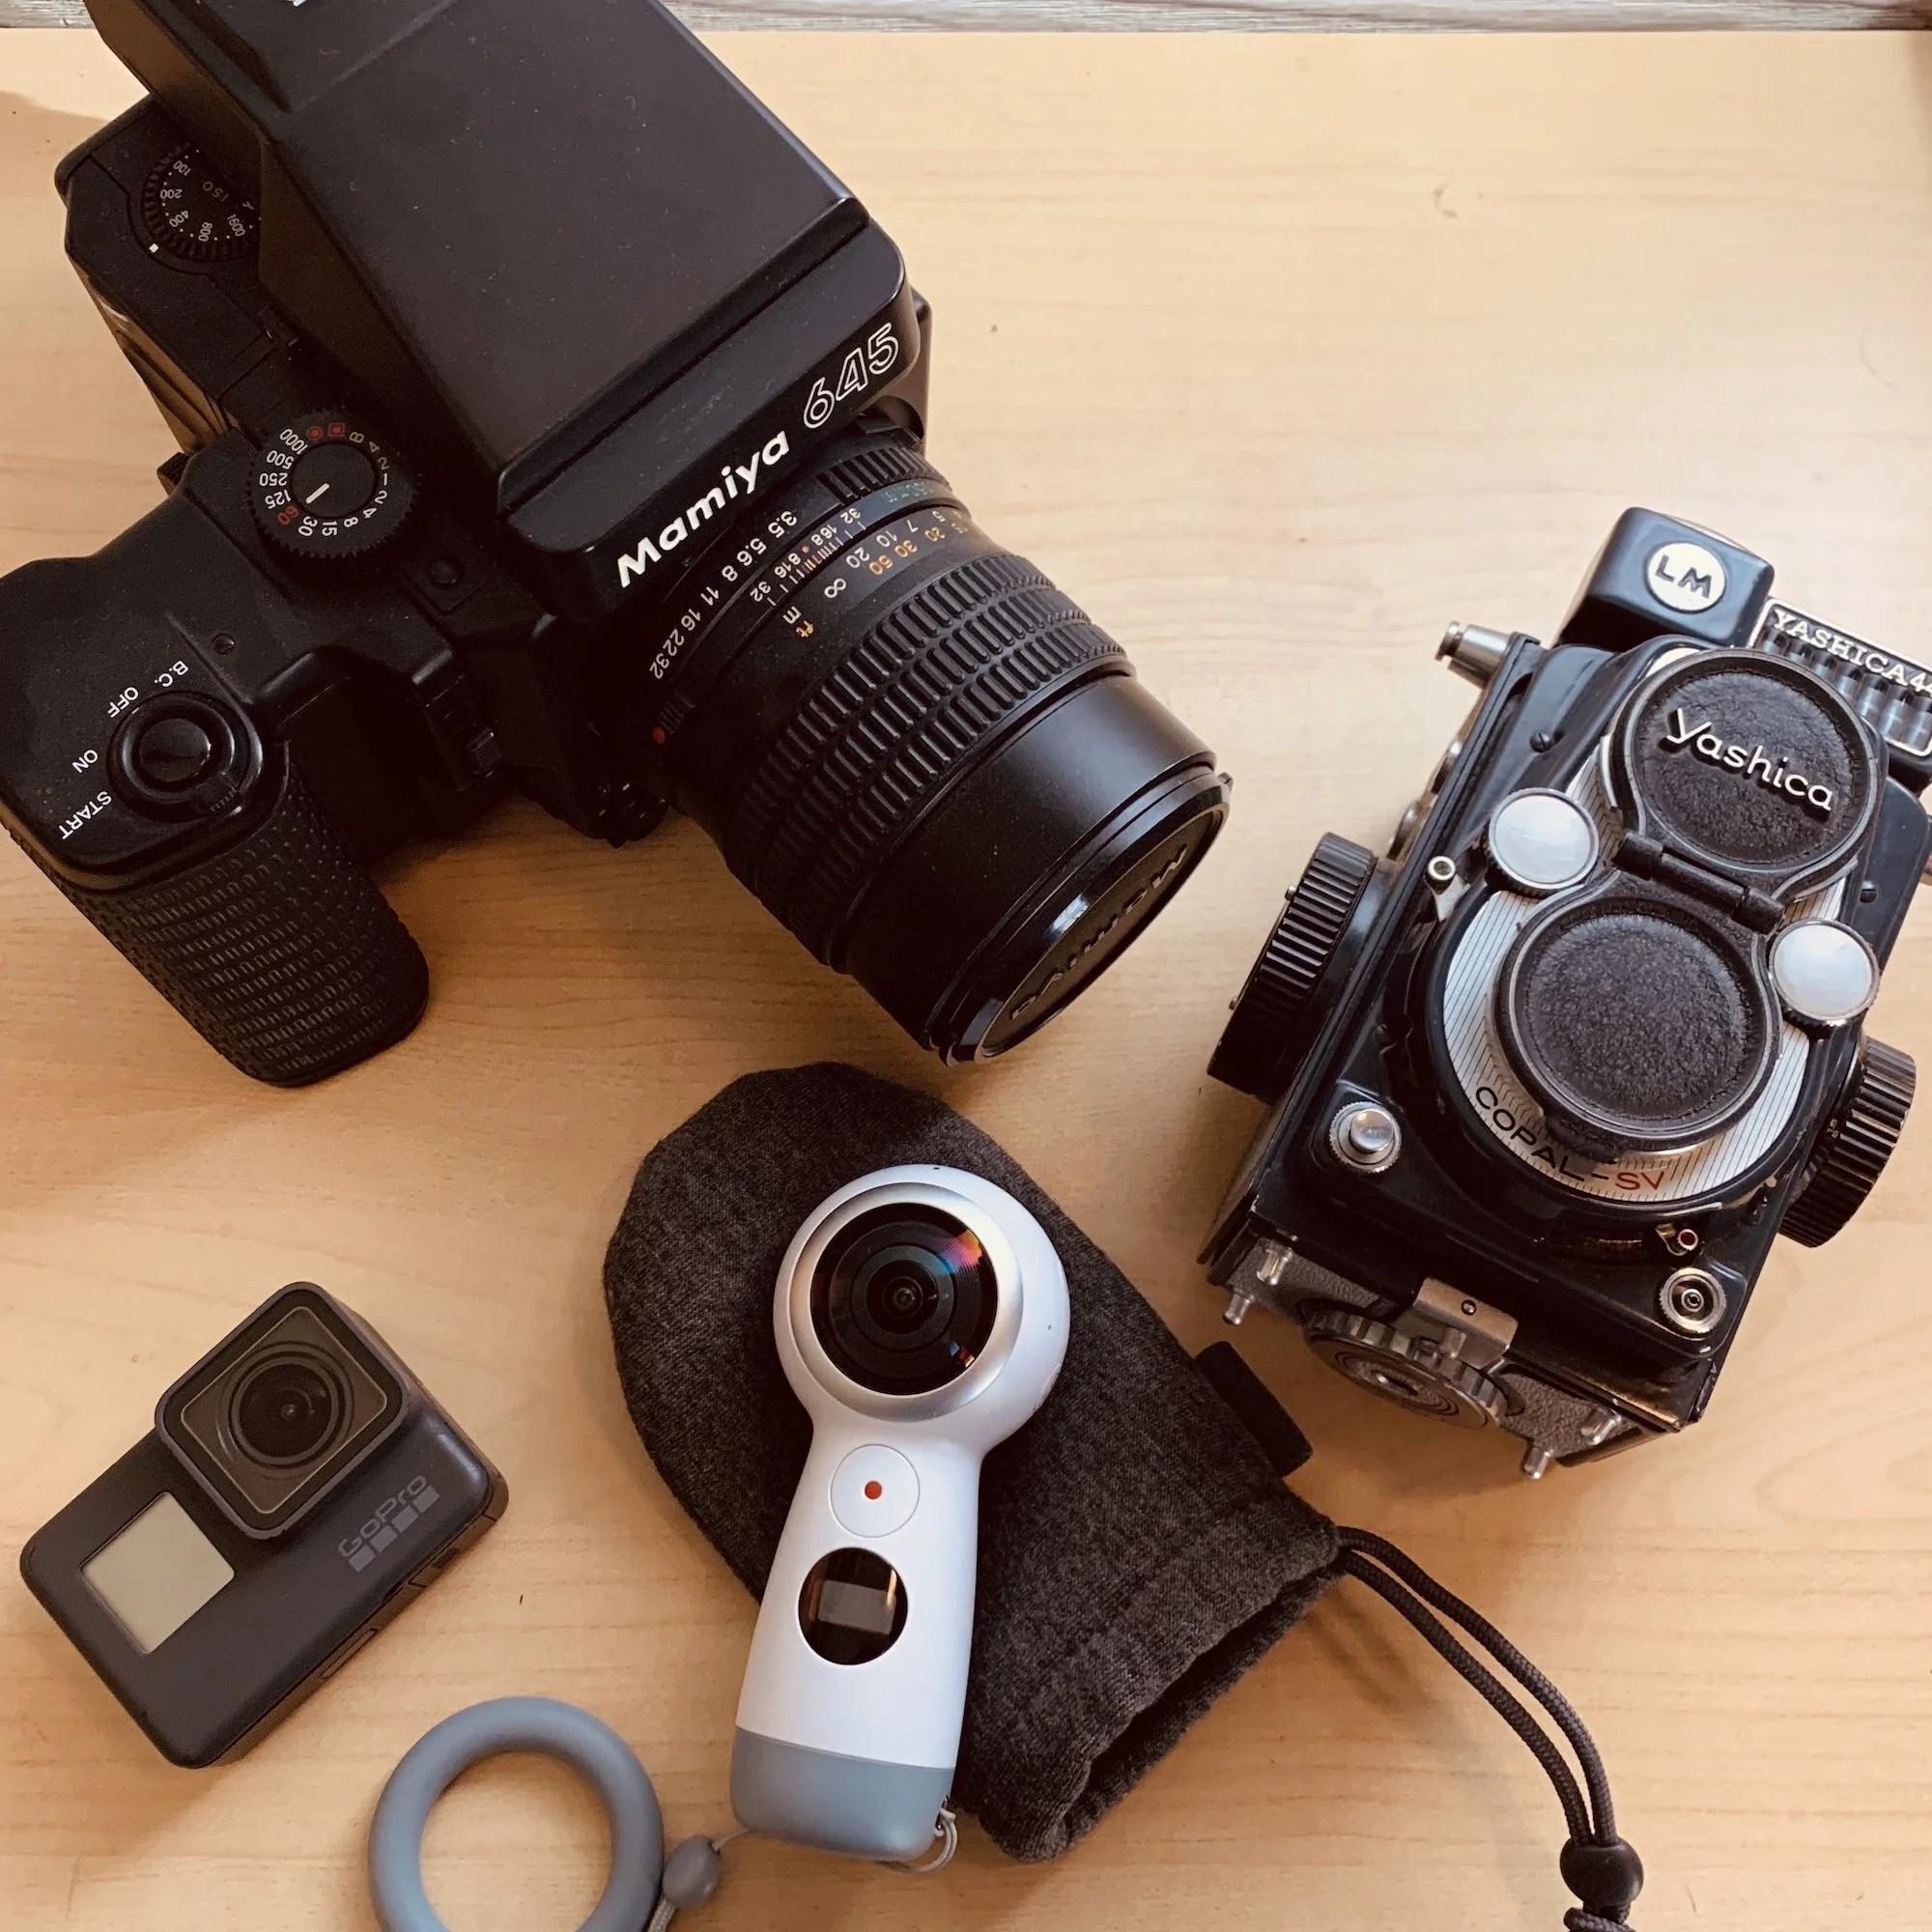
If you know a photographer, chances are they are always in need of new gear. But with the high price tags that come along with most camera equipment, it can be hard to find the perfect and useful gifts for photographers. Whether you’re looking for an inexpensive gift for your significant other, your friend or even yourself, we have compiled a list of cheap gifts sure to make the journey of photography more enjoyable and creative! Here are 19 affordable photography gift ideas that will help take any shutterbugs skills to the next level without breaking the bank.
A Camera Wrist Stap
A quality camera bag
A Leatherman Multitool
Reusable silica gel packets
Apple AirTag
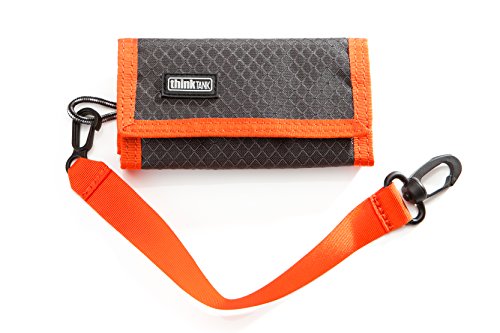
Memory Card Wallet
A Highspeed Memory card
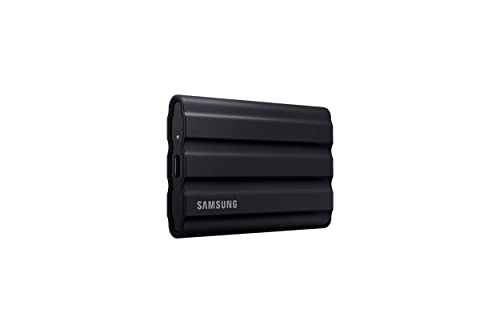
External SSD Drive
Backblaze computer backup software
A quality tripod
On / Off camera flash
Flash lighting modifyer
Compact Flashlight
Photography workbook
Reusable film camera
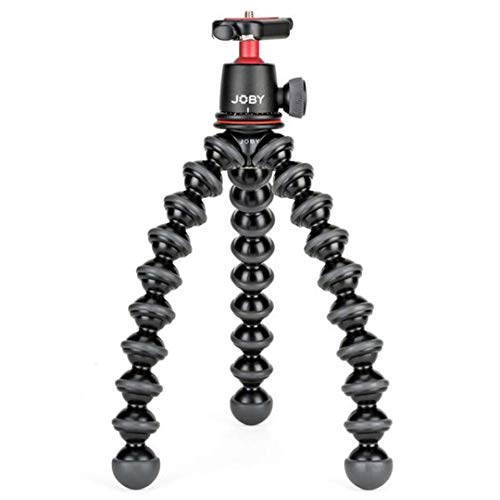
Travel Tripod
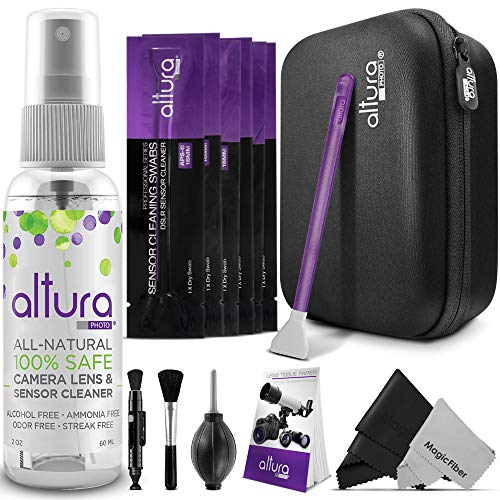
Cleaning kit
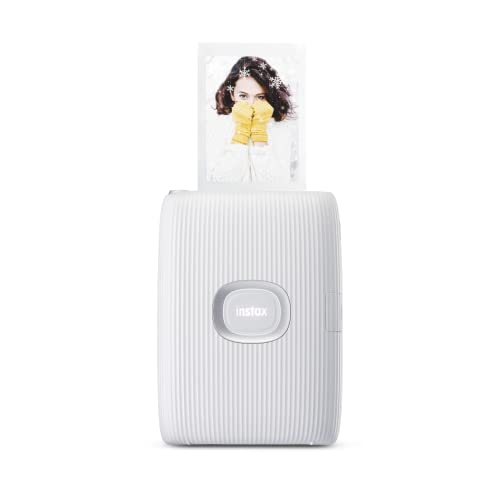
Instant Photo Printer
Photo book on Creativity
1: A camera wrist strap to keep your camera secure while shooting. The wrist strap is a welcome change from the burdensome neck strap. This wrist strap from Peak Design is built around their popular quick release anchors that allow you a secure hold when shooting and quick release when you need both hands.
2: A camera bag that fits all of your gear. The Tenba DNA 9 Slim may be small but it can pack everything you need for a day of shooting without calling unnecessary attention to it. It perfectly holds a camera with 2-3 lenses, a tablet, and still has room for filters, memory cards and more.
3: A multitool is an extremely versatile tool for photographers. From screwing in a tripod plate to removing a tight filter on your lens and even cutting off loose threads from a models dress the Leatherman Sidekick will prove so useful, you'll wonder how you ever survived without one.
4: Reusable silica gel packets to keep bags free of moisture. Before I found these, I didn't know they made reusable silica packets. Throw 2 of them in your bag to tackle unwanted humidity and moisture and keep your gear protected.
5: Don't risk losing or having your camera bag stolen. The Apple AirTag will give you peace of mind that you'll be able to track your gear anywhere in the world if your bag gets lost or stolen.

6: A memory card wallet to keep your cards organized and protected. No more throwing memory cards in your pocket and rising losing them or having them damaged.
7: A new SD card. This is a great reminder that you should replace your memory cards yearly to avoid potential corruption. I've been using these Lexar UHSII cards for their speed and build quality and couldn't be happier.
8: A portable hard drive to store your images. Keeping your images on a portable SSD will keep your computer from getting bogged down.
9: Backblaze is a piece of software that backs up your whole computer and keep your images safe in the cloud in the event of a fire, flood, or theft. It runs in the background of your computer backing up your images automatically, giving you one less thing to think about.
10: A Quality tripod is essential to keep images level and steady in windy or unpredictable locations. You will be blown away how much better a quality tripod is over whats available in big box stores. The added stability will really come through in the sharpness of your photos.
11: A dedicated flash unit will expand your creativity and help keep your images clean in dark environments. The Godox v850III is one of the highest rated manual flashes for its speed, power, and expandability to connect and trigger additional flash units off camera. And it will work with every camera manufacturer.
12: When bouncing your flash off a wall or ceiling isn't an option, the Rogue Flash Bender will give your light a high quality soft and beautiful look. It’s an essential tool for anyone using a flash unit on or off camera.
13: A compact flashlight is surprisingly handy solution for when inside of your camera bag feels like a black hole when you're looking for that one piece of gear or a spare battery. Rovyvon e7 compact flashlight is small, very bright, and has both rechargeable and a replaceable battery so you never run out of power!
14: After you learn the basics, a Photography workbook will help to give you small projects to work on to keep your skills sharp and expand your knowledge.
15: If the photographer you'r buying for seems to have it all, the Illford Sprite 35II reusable film camera is the perfect option, sure to surprise and delight. This is an easy and foolproof way to get that film look that everyone loves without the steep learning curve of shooting with a full manual film camera
16: Love travel photography? The Joby Gorillapod the a compact flexible travel tripod every photographer has been looking for. Small enough to fit into a backpack, strong enough to hold a full size dslr, and versatile enough to mount it anywhere and get super unique camera angles.
17: After a day of shooting, a Camera Cleaning Kit will ensure your photography gear looks as good as new for a long time! Cleaning your camera gear is easier than you think and can help to keep the resale value when you are ready to upgrade!
18: Sharing isn't just for social media, with the Fuji Instax Mini Link 2 you can make instant prints from your smartphone and share your photos the old fashioned way and easily create a beautiful keepsake of a special memory with family and friends.
19: For any photographer, creativity is the engine that drives us. Imaginarium: The Process Behind the Pictures is a great behind the scenes look at how the creative process works and how photographers can use it to create stand out compelling images that are sure to impress.

In conclusion, giving a photography-themed gift to a photographer this holiday season is a great way to show how much you care. I think that you’ll find the gifts on this list to be perfect for almost any photographer and at a price point that won’t break the bank. With so many options to choose from, you're sure to find the perfect present for your favorite shutterbug. Whatever you choose, make sure it is something that will bring them joy and help them capture memories for years to come.
In this quick review, you will find the 7 best photo editing software for beginners. All of them are easy to tackle, so you only need to choose the one that complies with your personal preferences and helps achieve the desired result. Let’s jump right in.
Read moreCloudSpot is my favorite online client gallery service. It’s built by photographers for photographers and their dedication to helping photographers succeed could not be more apparent then with their latest feature update, Album Builder integration.
Previously I was spending $240 a year on album design software so when CloudSpot announced their album builder will be included for all CloudSpot users, paid or free, I had to see it to believe it.
Im happy to say that after building just 1 album I was so happy with the results that I canceled my previous album builder subscription.
Clients can build their own albums allowing you to earn money with no additional work
Super easy to use! If you know how to drag and drop, you can build a beautiful album!
Lots of customizable options. From 4 different album sizes, more than a dozen album covers, and different paper thicknesses, CloudSpot has made it incredibly easy to make a one of a kind unique album.
That said there are a few things on my wishlist to make it an absolute killer!
Be able to create an album as a photographer and send a client the link to purchase or make modifications themselves
Be able to order multiple duplicate albums for parent albums
The ability to add an album to a client gallery similar to how CloudSpot displays videos.
So while there are some features I would love to see brought to the platform, its already powerful enough to replace my old album building software I was spending hundreds of dollars on ever year.
Sign up for CloudSpot today and start building albums for free!

Protecting your photographs online is easy if you know how. Find out how you can keep your images safe from theft and copyright infringement.
Read more
Are you ready to get out in the world and start showing off your skills as a photographer? If so, a photography portfolio is going to be one of those essential pieces of your toolkit to have ready. Here are beginner-ready tips for how to make a professional photography portfolio for all of your potential clients!
First thing’s first. A lot of people get a different idea of what a portfolio should or should not be. In its most basic form, this is a collection of your self-determined best images that you love and can put together to show a potential client to help convince them to hire you. The prints that you choose should help show your personality, your qualifications, and your experience.
A portfolio is standard in the professional world, and among many different art forms, so having one ready -- either a print or a digital one, or both -- is not only standard with those who are serious about photography, but expected by professional clients who are seriously shopping. If you have or want to start a photography business a portfolio is standard to showcase your work to a potential client.
The main steps to help you build a client-focused portfolio are pretty much the same, regardless of who you are talking to -- which is precisely the point! Take a look.
Curate it for your client: If someone’s looking to hire you for bridal photography, for instance, you aren't going to want to show them photos of kids or pets. Create a portfolio that is focused on prints that will show them why you’re the right hire. If you shoot multiple photography niches feel free to make multiple portfolios so you can best suit your audience.
Choose only from your best photos: This should go without saying, but it’s especially important. When choosing the pieces for your portfolio, you want to only choose from the top of the top, the best of the best. Just “nice” or “okay” shouldn't make the cut! Need a second opinion? Ask someone to look at it and give you feedback, but make sure it’s someone you trust to tell you the truth! Choose photos where each image stands on its own.
Focus on variety: Using our bridal photography example above, it’s still important to show the client that you can do a variety of jobs. Don’t include shots just from one specific photoshoot and none other, or all headshots with no landscapes. Clients want to see that you’ve done this successfully several times before. They'll be looking for that variety in your prints on both your subjects as well as the kinds of photos that you take.
Order your portfolio carefully: The order that you use for your photos is going to determine how they’re received by the client, so spend some time and effort specifically on this part! The order should tell a story and each print should be more magnificent than the last, essentially creating a narrative through photos. It will take last-minute switches and juggling around, but it’s certainly worth it!
Take a calculated risk: Risks are important in the world of art, and this extends to your portfolio. Don’t just put prim and proper shots in there, don’t be afraid to take a risk that you think is going to show examples of your creativity and innovation, even if it’s a little bit outside the box.
Stay current and modern: Trends changes and expectations change. Make sure that our portfolio is going to be shuffled and replaced with new “best” prints as you get them. Someone who hires you for jobs 2 years apart should not be seeing the exact same portfolio! Practice grabbing one image from every shoot just for yourself to try something new and amazing. Over time you will have many options to pick from that will help you in updating and building your portfolio.
This is an excellent question, but one that many people skip over. A portfolio for photography is more than just a collection of images that are professional and appealing for technique. You should also be working at telling a story and showing off both your talent, your style, and the vision that you have for the images that you’re creating. That’s what is going to sway your customer.
No clients? No problem! Ask for volunteers in your personal life and start creating shots that are going to make their way into your portfolio. Again, make sure it’s got variety, scope, etc. As you get clients, you can start adding those in to replace or accompany the volunteer photos.
There seems to be a few opinions on this. Some feel as though you should stuff 60+ photos in a portfolio to show how talented you are. However, professionalism is in a curated and trimmed portfolio as much as it is in the content itself! For the best professional look and feel, you’re going to want to look for 10-15, or fewer. These prints should all make an impact and show that you are the real deal. If you think you can cut one or two without interrupting the flow, do it!
There’s no magic bullet to making sure that clients remember your portfolio as being totally unique. However, you can certainly make sure that it’s the best and strongest it can be by keeping it fresh and creative wherever possible. While highlighting that you are experienced with many technical aspects design is an important element to keep top of mind that will help your portfolio stand out. Keep learning and trying and experimenting, and make sure that continual education shows up in your portfolio. It will help clients see that you have many ideas to offer and that this is your passion and you take it seriously. That, if anything, will help it stand out amongst the competition!
There are some who feel that printed portfolios are the only true option when it comes to the idea of showing your photography off. Throughout the years, that’s certainly been the case. However, online portfolios also give you a certain authenticity, too.
The best advice for this is that you should start with an online photography portfolio even if it’s just on Instagram. Simple to set-up and effective when you need to show your prints off quickly, they’re user-friendly and designed for the modern photographer. Once you’ve got your portfolio solid and steady enough that you always go with the same prints to show clients, you can also look at creating a print portfolio with those prints.
Realistically speaking, there’s no rule saying that you can’t have both! Having both even helps make sure that you don’t lose a client because they prefer one over the other! Just make sure that you stay consistent between print and digital (as part of the images that you use).
If you’re interested in creating a photography portfolio online, then check out CloudSpot! This is a website that is popular with photographers of all kinds and at all images. You can upload your images into a gallery and then when you’ve got it just right, you can email your gallery link or share it with the world on social media. With CloudSpot’s paid plans you can turn that gallery into a mobile app that you can have on hand to share when you need to show someone what you can do. It’s an ideal, thoroughly modern option perfect to grab a client’s attention!

While it does take time and effort to get a photography portfolio ready to show clients, its professionalism is certainly going to make it worth your while. It also will separate you out from those who haven’t taken the time to do it properly and are showing half-finished or incomplete images. When it comes to winning the client’s respect and their loyalty, this will work firmly in your favor!
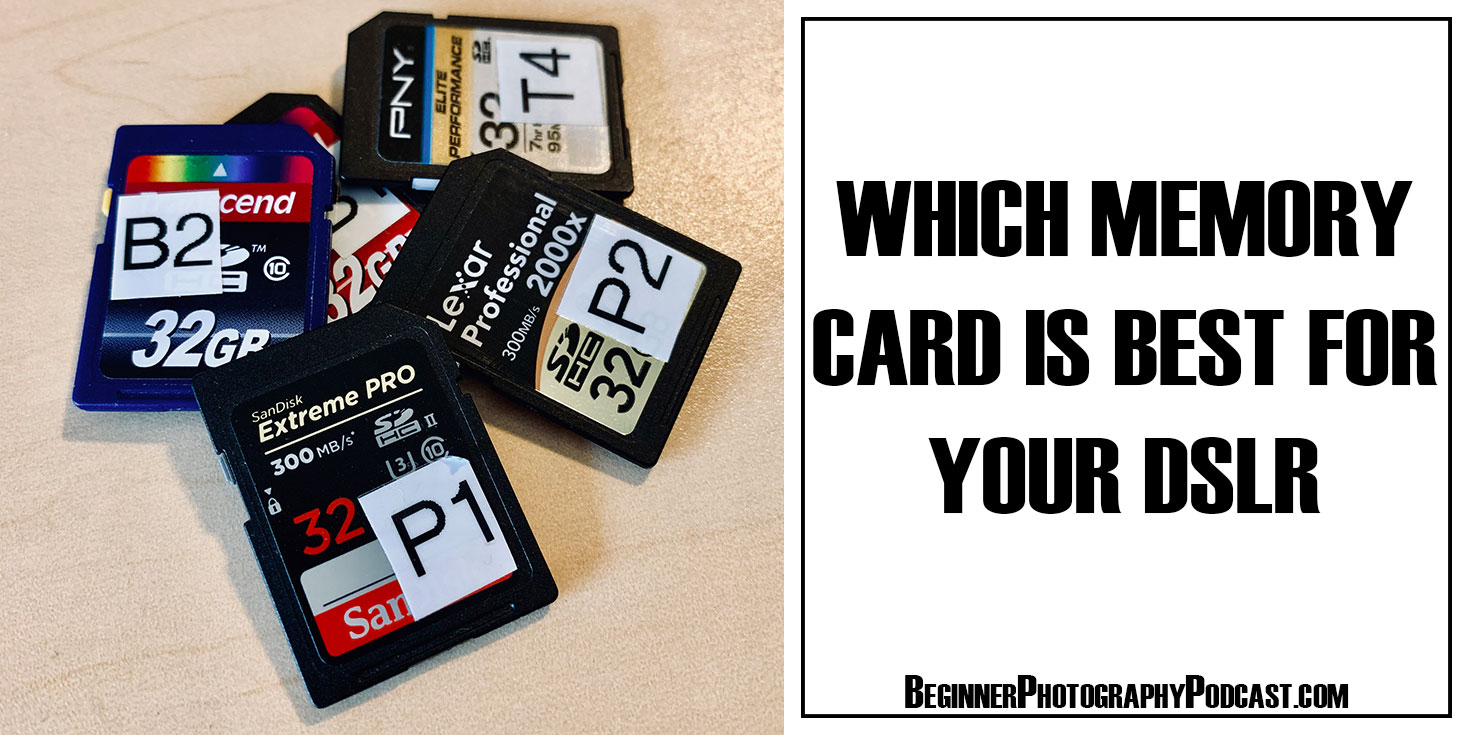
Your memory card is arguably the most important piece of your photography setup and with a variest of memory card options for your DSLR choosing the right memory card can be overwhelming. In this article I break down my top choices for the best memory cards available for your DSLR or Mirrorless camera.
Read more
Want to know how to learn photography on your own online? Here I will teach you the basic understanding of how photography works and the fundamentals you need to start shooting like a pro no matter what you want to shoot.
Read moreThere is no shortage of ways to learn photography. From Photography tutorials on Youtube, Photography Podcasts, and Photography courses and workshops it is easy to forget about the golden standard and the way many beginners learned photography for a century before the internet, BOOKS!
It may seem weird learning photography from books which are traditionally full of text but the truth is books cost a lot of money to produce and therefore the content in them is much higher quality than the majority of free resources. I can tell you first hand these are the best photography books for beginners and if you are serious about learning photography these books will guide you wherever you want your camera to take you.
This article contains affiliate links to the books listed and if you purchase one of the photography books below I may receive a small commission but this has in no way influenced my real world experience using each and every book listed below.
Veteran photographer Bryan Peterson explains the fundamentals of light, aperture, and shutter speed and how they interact with and influence one another. With an emphasis on finding the right exposure even in tricky situations, Understanding Exposure shows you how to get (or lose) sharpness and contrast in images, freeze action, and take the best meter readings, while also exploring filters, flash, and light.
Taking a portrait is not an easy task. In fact its an art form of its own and Chris Orwig has mastered this art and shares his wealth of knowledge with you. The techniques are refreshingly simple and quickly build confidence. From finding subjects to preparing your own self and how to encourage your subject, this book filled with more than 400 pages of portrait photography tips and education has it all. If you want to take soulful photos full of meaning and not just snapshots, this is the book for you.
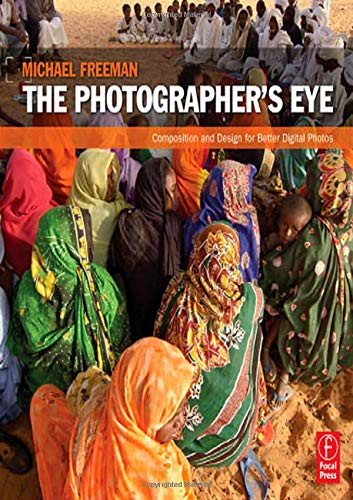
Design is the single most important factor in creating a successful photograph. The ability to see the potential for a strong picture and then organize the graphic elements into an effective, compelling composition has always been one of the key skills in making photographs.
In this book, Photographer Michael Freeman teaches how digital photography has brought a new, exciting aspect to design with instant feedback from a digital camera allows immediate appraisal and improvement. This has had a profound effect on the way digital photographers take pictures.
Marc Silber has not only been a guest on the Beginner Photography Podcast but has interviewed some of the world's best photographers and learned their secrets for stunning composition. Now he passes their wisdom along to you in an easy to understand handbook. Too many photographers get to a certain level and find it hard to advance. We're bombarded with so many videos, books and people telling you what to do it can be overwhelming. Marc wrote Advancing Your Photography so you could have one easy to read handbook to carry with you. All his tips are based on decades of photography and the deep wisdom of the fantastic photographers he's interviewed.
When I attended film school, our education was broken up into two main themes. Technical and theoretical.
The technical was obvious and anyone could learn it quite easily.
The theoretical is what fascinated me.
After graduating I transitioned into photography. All the technicals remained the same as cinematography but I always felt I was missing the theoretical lessons of photography and what happened in the past to get us to where we are today.
Good Pictures by Kim Beil provides a fascinating look at how we got to where we are today in photography and why we use the tools we do.
Before reading the book I had never given the question of why do we have vignettes and where did they come from, a single thought. I feel much more connected to photography after reading Good Pictures. Highly recommended.
If you’ve been frustrated and overwhelmed by the challenges of real-world locations and executing a great image–or if you simply want to become a better shooter but don’t know where to start– Roberto Valenzuela’s Picture Perfect Practice gives you the tools and information you need to finally become the kind of photographer you’ve always wanted to be: the kind who can confidently walk into any location, under any lighting condition, with any subject, and know that you can create astonishing photographs that have a timeless impact.
When photographing people, you can have a great composition, perfect light, and the right camera settings, but if your subject doesn’t look right―if the pose is off―the shot will not be a keeper. Posing is truly a crucial skill that photographers need to have in order to create great photographs. If you’re looking to improve your ability to pose your subjects―whether they’re men, women, couples, or groups―best-selling author and photographer Lindsay Adler’s The Photographer’s Guide to Posing: Techniques to Flatter Everyone is the perfect resource for you.
Competition in the photography industry has never been fiercer. But in this empowering guide, acclaimed photographer Dane Sanders reveals that the key to success is to stop worrying about what everyone else is doing and start focusing on your most powerful resource: you.
With nearly 60 years of photography experience, Joel Meyerowitz knows his way around the camera and shares some of his best tips to creating compelling and beautiful images in this book, How I Make Photographs. Joel Meyerowitz has been called one of the most respected street photographers of all time and in this book he breaks down 4 key concepts that will help you to better capture your world.
How to use a camera to reclaim the streets as your own
Why you need to watch the world always with a sense of possibility
How to set your subjects at ease
The importance of being playful and of finding a lens that suits your personality.


This groundbreaking book presents a remarkable selection of contact sheets, revealing how the most celebrated Magnum photographers capture and edit the very best shots. Addressing key questions of photographic practice, the book illuminates the creative methods, strategies, and editing processes behind some of the world’s most iconic images. The book is a bonus because it is less actionable than others on this list and focuses more on the stories from the photographers who took the photos. This is a must read.
In this quick review, you will find the 7 best photo editing software for beginners. All of them are easy to tackle, so you only need to choose the one that complies with your personal preferences and helps achieve the desired result. Let’s jump right in.
Protecting your photographs online is easy if you know how. Find out how you can keep your images safe from theft and copyright infringement.
Your memory card is arguably the most important piece of your photography setup and with a variest of memory card options for your DSLR choosing the right memory card can be overwhelming. In this article I break down my top choices for the best memory cards available for your DSLR or Mirrorless camera.
Want to know how to learn photography on your own online? Here I will teach you the basic understanding of how photography works and the fundamentals you need to start shooting like a pro no matter what you want to shoot.
The 35mm lens is a fantastic lens and today I will give you 6 reasons why its better than the 50mm lens.
Read moreEnjoy the videos and music you love, upload original content, and share it all with friends, family, and the world on YouTube.
Humans capture more photos today, in a 24 hour period that were captured during the first 150 years collectively after the invention of photography. To say we take a lot of photos is an understatement! But when it comes time to doing something with them, rather than decorate our home with photos we tend to just leave them on our phones or computers.
A photograph is a memory, a photograph is a reminder, a photograph is art. They are meant to be displayed! Today I want to show you how to use one of my favorite ideas for displaying photos on blank walls around your home, canvas prints to make a statement wall with your photos. I use and love the quality of canvas prints from CanvasDiscount.com

The process of decorating your home with photos can seem like a big task. The majority of us are not design professionals (I'm sure not) and you may ask yourself “How do I make a blank wall interesting?”. Luckily the answer is easier than you think and I’m going to show you how to do it!
My wife and I wanted to spruce up our home specifically, we wanted to know how to make a blank wall interesting. There are so many options but decided at first on buying a herringbone paint stencil kit off amazon. The job took us a weekend and turned out great. Pro-tip the less paint on the roller the cleaner your lines turn out.

But after a month or so is when we still felt the wall was a bit empty and even though it was painted, still felt blank. So we decided that this is where we would hang our long overdue family photos.
When decorating my home with photos I found that the hardest part was just finding design inspiration. I knew we wanted canvas prints because of the warmth and dimension they bring to a room but simply didn't know how to design the wall of photos!
I did a lot of Pinterest searches to see what others were doing that looked good for our space and here are my 5 favorite and tasteful ideas for displaying photos on walls. Don't overcomplicate this. Choose a style that you think looks best and just go for it. There's a good chance you will want to actually redesign the canvas prints on your wall, and that’s fine!


To know what you can put on the wall you need to know how big the wall is. In our case, we had 68 inches of horizontal wall space to use for our canvas prints. We knew we wanted to make a statement wall with our family photos so I went to CanvasDiscount.com to see what options were available to make canvas prints.
We chose a single 24x36 family photo for the center complimentary 12x12 canvas prints of each family member to complement the family photo centerpiece. Your first reaction will be that you don’t want your canvas prints to be too big, but if you want a statement wall get your canvas prints one size larger than you think you need. The impact a large photo makes is indescribable.
CanvasDiscount.com makes the canvas ordering process easy and intuitive. The quality of their canvas prints are incredible and for the price, I can’t imagine a more cost-effective way to decorate the walls of your home with beautiful photos. On top of that, you can save 15% off your order when you use the code “BeginnerPhoto15” at checkout.

There are several ways to hang canvas prints. The traditional way to hang a canvas print is to use a mounting bracket on the back of the canvas and then hang it on a nail in your wall. But if you want to hang a canvas print without nails, because you rent or want the option to change your design later and not have nail holes in your walls, don’t worry you still have options.
My first question was Do Command Strips work on canvas and the answer is YES! (but there’s a twist) I would not recommend mounting a command strip on to the actual canvas surface of the frame. I’m assuming because of the ink, the canvas itself does not seem to adhere very well to the command strip.

Luckily 3M makes specialty damage-free canvas hangers that I found at the store and are available on Amazon. I used the (confusingly named) large canvas hanger for the 12x12 canvas prints and 2 of the (more accurately named) jumbo canvas hanger for the 24x36 canvas print.
These worked out perfect my wife and I changed the arrangement of the canvas prints and the command strip canvas hangers could be removed without any damage to the wall.
Remember just because you worked hard on making the perfect design of photos does not mean you have to keep them that way. We thought we would just decorate one wall with photos but because the 12x12 canvas prints were able to hold their own on the wall, we moved the 24x36 family photo to the entryway and were able to decorate 2 walls in our house with photos.
On top of that, the kids love seeing themselves when they come down the stairs in the morning. It has bonded the family in a way I didn’t expect. If you’re wondering what is the best website for canvas prints, you won't be disappointed by CanvasDiscount.com

Today I'm sharing the 5 simple things I'm doing during this global pandemic to grow my wedding photography business. WITH A BONUS TIP that has made me more than $15,000 in revenue, paying for itself 62.5x over, that I am not sharing anywhere else!
2020 has really hit those of us in the photography industry pretty hard. With a global pandemic, we are limited to how much interaction we have with each other and with many people having lost their jobs, the inquiries have slowed down quite a bit.
With this time at home, I am determined to not let it go to waste and build a stronger business so when this is over and we all gain back some normalcy I will be more prepared and just set up for better success.
While I'm sharing these things and what I'm doing to grow my business during a pandemic, all of these are just tried and tested things we should all be doing but never seem to find the time for. So no matter, if there's another global pandemic or an economic disaster all of these tips, will work for you no matter your photography business.
Disclaimer: This post contains affiliate links to the products listed below that I use every day. Clicking on one of these links helps support the podcast as the podcast will receive a small commission.
We photographers often feel much more comfortable with a camera in our hand than we do having to make business decisions so we typically just push the business stuff to the side until we “get around to it”. While I still associate myself as more of a photographer than a business person I have found learning about business to be a less painful when listening to an audio book. I use audible to download and listen to audiobooks on business. My favorite book on business is “The Go Giver” by Bob Burg. It will change how you see operating a business. Right now I'm re listening to it and finding it amazing how much you pick up on when you listen to it again.
You can download The Go Giver absolutely FREE when you sign up for Audible with my affiliate link. http://www.audibletrial.com/BPP

One of the business books I listened to last year that made an impact on me was a book called “365 Thank Yous” by John Kralik. It’s the real-life story of a Lawyer who was at the lowest point in his life and simply started sending out thank you cards to those in his life who he was thankful for. I started off 2020 strong with sending out thank-yous and have made a continued effort to do so now as it's more important than ever. The thank you cards do not have to be a novel but just a simple note to let someone know you’re thinking of them. The response I have got from those I have sent cards to has been enormous. While the goal of the thank you cards is to show other my gratitude for their roll in my life I can't help but see potential bookings in the future. All for 55 cents.
Selling some cameras I don’t use much any more has allowed me to continue running powerful facebook and instagram ads
This one isn't directly related to growing my business but hear me out. With the current uncertainty of the economy many are holding on to their money a bit longer until it's safer to make a decision. Myself included. Selling some unused gear to KEH.com has allowed me to make investments in my business. I turned around and took the money to pay for a Facebook Ad to promote my free wedding planning guide for local brides. Because other businesses have stopped buying ads, my cost to acquire the contact info of a bride is dirt cheap! Now I can follow up, learn more about their needs and worries, and offer my services if they would be helpful.
As photographers, we take photos through communicating with our clients. The more effective we are at our communication the better. I'm sure you can think of a time where you may be tripped over your words or felt nervous before a client meeting. Those things can cost you thousands in lost revenue. I’m taking, Heroic Public Speaking with Michael and Amy Port class on Creative Live which walks you through step by step how to craft your message and communicate your point effectively to strangers. I felt like I knew my business pretty well before but this has really really tightened it up. I would recommend the class to just about everyone, especially introverts like myself. Its one of those classes that after you take it, you almost can’t believe it cost less than $50.

I’ve been spending my mornings learning Heroic Public Speaking with Michael and Amy using the Creative Live App on my iPad before the kids get up.
This pandemic has taught me something very important, I can't rely on just shooting weddings. I have a friend who is a wedding videographer who told me he shoots real estate photos on the side. It’s not enough of an income to replace shooting weddings but for the time involved its definitely worth it but you need to know how to use photoshop to give the homes you're shooting a polished look. I've said before on this channel that as a wedding photographer about 95% of my editing is done in Lightroom and truth be told I don't know much about photoshop but I would be happy to learn if it could bring in some extra cash. And when you search youtube for photoshop tutorials the info is either from an older version of photoshop, incomplete information or simply clickbait. Luckily this is where Phlearn Pro comes in to help. Their “HDR vs Luminosity Masks” tutorial has changed my life.
And with SO many other photoshop tutorials on offer, I learned a much much much better way to retouch my wedding images to give them a magazine polished look my brides will LOVE.
Here is an example of the best single exposure real estate image I could make in Lightroom and then again using what I learned from the Luminosity masks tutorial within Phlearn Pro. There is still some room to grow but I’d still say this is a huge improvement over the Lightroom version!

Lightroom makes working with different white balances and light amounts very difficult

Using Luminosity Masks in Photoshop enables you to edit difficult images much truer to life!
We all know the importance that social media plays in the success of our business and we all know the importance that making videos has for our business as well. With Animoto Slideshow Maker you can easily and very quickly create beautiful slideshows the day after, or even the day of an event. I simply download the cards onto my computer after a wedding, pick out 50-60 images that tell a short story of the day then upload them to Animoto’s easy to use slideshow builder on my computer (or iPad app if I am traveling) and I let it take care of the rest before I export and share it on social media for my couples to share with all of their friends and family. This single tip has made me more than $15,000 in revenue since I started doing it. So right now Im taking the same concept and using Animoto’s Marketing Videos feature to create dozens of quick socially shareable slideshows from my past wedding and engagement images. Capturing peoples attention is tough but Animoto makes capturing their attention easier than ever. Creating a video of just wedding rings, outdoor engagement photos, outdoor bridal photos, rainy wedding photos, night time wedding photos, camera aware photos, bridal party photos, reception photos, and so on and so on. These videos take less than 5 mins to create in Animoto and can be shared over and over again to build your awareness.
Facebook and Instagram LOVE short video content! This video was made in less than 5 minutes using one of Animotos built in wedding photography templates.
Here is a real wedding slideshow I made with Animoto and delivered to my couple the day after their wedding because Animoto makes the whole process so easy.
I want to know what are you working on right now!
Are you focusing on the administrative tasks you never have time for normally or are you working on all the fun ideas that fulfill your creative bucket? Leave a comment below and let me know!
The Fujifilm x100v is the latest offering from Fujifilm in the popular x100 series of cameras. I spend 4 days in San Antonio to test the new camera out. Here is the official review.
Buy the Silver x100v on Amazon - https://amzn.to/39QUjxd
Buy the Black x100v on Amazon - https://amzn.to/2TQKl9x
Buy the x100f on Amazon - https://amzn.to/2QdMBFw


Buy the Silver x100v on Amazon - https://amzn.to/39QUjxd
Buy the Black x100v on Amazon - https://amzn.to/2TQKl9x
Buy the x100f on Amazon - https://amzn.to/2QdMBFw
Disclaimer: The transcript was transcribed electronically by Temi.com and may contain errors that do not reflect accurately what the speaker said. Because of this, please do not quote this automated transcript.
Raymond (00:00): The X 100 V looks pretty close to perfect on paper, but in practice does it live up to the hype? I just spent four days in Texas shooting with the brand new Fuji X100V and in this video I'm going to show you what I loved and what I did not. So let's get into it. First off, I'm going to let you know that I think that the Fuji X100V is, it's just an absolutely amazing camera, but it's not for everybody. Now, I've always been the kind of person to carry a camera with me wherever I go. Now, up until now, that camera for me has always been the Fuji X70 I think that it is honestly the perfect blend of portability and image quality, but for my use of using it to take photos of the kids, it's aging. Autofocus is really starting to show its age and as a professional wedding photographer, I can tell you without a doubt that this just doesn't cut it at a wedding.
Raymond (00:56): So when the X100V was announced, I thought to myself finally, here is a camera that I can use for my personal photography when photographing my kids, but also a camera that can be used professionally because you know the IQ is similar, if not equal to that of what is found in the X T three and on top of that, I shoot 90% of my weddings on the 23 mm lens. So it seems perfect. So I got the X100V I bought it a plane and then spent four days shooting with it in San Antonio. So let's talk auto focus. That's something that is always important when talking about a new camera. The expert too with the 23 1.4 Is no slouch, but the X100V I mean just blows it away. The real surprise for me was when shooting the X100V in low to next to no light conditions.
Raymond (01:49): It seemed to find the whatever I was trying to focus on, no matter, no matter how little light there was, which was fantastic. And not only that, but it did it ultra fast. I'm pretty confident to say that I think that the Fuji X10 V is going to do just fine at a wedding reception. Another thing that I know people are really excited about is the brand new classic negative film simulation and let me tell you it is, it's a lot of fun. The greens when shooting classic negative really make an image feel like film, but here's the thing, I'm not sure. The classic negative as is as well rounded as classic Chrome classic Chrome just seems to work in a whole lot more situations than classic negative does. Classic negative really works great. I mean beautifully in a situation where you're photographing very few colors where whatever your main subject is is either red, green or blue.
Raymond (02:45): When it's one of the primary colors, it can just really make whatever that subject is truly stand out, but when you're shooting something where there isn't a predominant subject and whatever that predominant subject is, isn't red, green or blue? An image can be very busy with the amount of additional colors that can be added into a scene. And for that reason, I think that's why classic Chrome to me seems more versatile and I'm probably gonna continue to keep shooting most of my images on that. So that brings us to the tilty screen before I think the the Nikon D seven 50 came out, I always kind of brushed off as kind of a extra, you don't need that to take a good photo. And even though I thought that I would never use the flip screen, it wasn't until I had it that I realized it allowed me to shoot in an entirely different way because now suddenly I could just simply hold the camera down and get a lower perspective and still have an interest in composition without having to physically have to lay on the ground.
Raymond (03:45): But when it came to the X100V when I shoot a wedding, I love my XPro2 because I love the optical view finder. So with the X100 series cameras, I knew that I already loved the the range finder and the optical view finder here, but when I photograph the kids, I really love the tilt the screen of the X70 here as this allows me to hold the camera down on the kids level. I cannot tell you how excited I was to finally give the X 100 series cameras another chance to see if that it could fit within my world of wanting a camera for both personal and professional use. Now this may be a little bit nitpicky, but when coming from the X70 or the XT3, the tilt screen right here, you can pull it up from the bottom. You can pull it up from the side, you could pull down on it from the top because the screen protrudes just a little bit and this makes it great to be able to just turn on the camera and then with my other finger down at the bottom, just flip up the screen and start shooting.
Raymond (04:56): No, I assumed that it was going to be exactly the same for the X 100 V here, but if you notice the screen is flush with the rest of the body except for this little area right here, not being able to pull up the screen from the bottom, but having to come here from the side just feels like there's a little bit too much torque on the edge of this screen. Then I would like, and now honestly I've only had the camera for well now like five or six days, so this may just take some getting used to, I don't know, just something to be aware of. Next bit. I really thought that I was going to miss the D pad on the X100V when shooting weddings with the Xpro 2 here I customize my D pad for white balance auto focus settings, film simulation, face detection, but to be honest, I really don't miss the deep hat as much as I thought that I would, and even on the XPro2 and even on the X 70 here, there's a Q for quick menu, but now that the D pad has gone on the X100V it forced me to go into the menu and kind of set it up the way that I would a D pad.
Raymond (06:03): And to be honest, I like it, but I'm not exactly sure why. Fuji decided to put the Q button where it is on the X100V for all compared to the rest of the buttons. It's very small and it doesn't stick out. It doesn't protrude like the rest of the buttons, so you can't find it as quickly without looking. I feel like the point of the quick menu is so that you can get to a setting that you need very quickly, almost intuitively. So the last thing that you want to do is have to hunt for where that button is. So that's a minor gripe number two. Oh, also going through the quick menu button. I don't know if this is going to be updated in firmware soon, but I really wish with all the previous X100 cameras, there was a a view mode option right here next to the viewfinder so that if you were shooting, if you wanted to just use the optical viewfinder, that was an option for you.
Raymond (06:51): If you just wanted to use the rear LCD, that was an option for you. If you wanted to use the eye sensor to determine whether or not you were looking through the viewfinder or looking at the LCD, that's an option for you. But they food, you removed that button, meaning to be able to get to that setting, you have to go into the menus and I believe that that's three or four clicks away. So that would make sense to work within the Q menu where you could just turn on the camera, press the cue button, make your adjustment to whatever view mode it is that you wanted and then be able to move on. But as far as I can tell that's not an option. And the other thing is neither is quick record for video on the X 70 here, this button, it comes as quick record.
Raymond (07:34): I did the exact same thing with max pro too so that when I'm at weddings, if I'm taking photos I can just take a quick few seconds of video to be able to just deliver something more to my clients. The last X 100 series camera that I had was the X100T and that was an option to be able to customize this front button right here to be quick record. And that's something that I really wish I had access to. So I'm not sure why it has to have its own dedicated movie shooting mode, unlike the X pro 2. Hopefully that gets addressed in a firmware update in the future, but for now if that's something that's really important to you, just be aware of it. So it may sound like I am kind of nitpicking on this camera. I'm not trying to, it's still really feels almost like an extension of of your photographic mind's eye. Raymond (08:16): When you see a photo, when you see a scene, you can see what that photo is. And with the X 100 series cameras, it's just been the best tool for me being able to adjust all my settings before I even turn on the camera so that when I turn it on I snap and then I'm done. I think that it really sits within a really strange price point area because on one hand, as a professional photographer, it's not necessarily an inexpensive camera and the camera does check a lot of the boxes that I want. So while the image quality is fantastic and I personally find it just a delight to use, I think that it would be hard for a hobbyist to justify the price of the camera or, or at least justify purchasing it new. Think about the options between the X100F and the X100V and you're okay with not having a tilt the screen, I would say save the, you know, $800 and get yourself an X100F now the camera's not gonna make you a better photographer.
Raymond (09:14): It's really interesting because I've been preaching this for a long time. I've seen this firsthand in my own work. I went from a cannon XT to a 40D to a 5D Mark 2 then the three before downgrading from full frame to a Fuji XT1. And once I did, I realized that this really didn't change my work at all. It changes how I go about my work, but it doesn't actually change the photos themselves. So when I'm pre-ordered the X100V I was just imagining all the photos that I would be able to take. And then once I got it, I realized I'm still the exact same photographer as I've always been. But what's changed is the tool. So for me the X100V is the right tool, but for hobbyist, somebody who maybe isn't making their living off of photography, again, it really might be hard to justify the price.
Raymond (10:03): But if you really want, I mean just the absolute best camera that you can buy that you can take with you just about everywhere that you go, that just feels fun to shoot with. I don't think that there's a better camera than the X 100 V is the Fuji X100V the right choice for you. Leave a comment below. Tell me what it is that gets you really excited about this camera. Tell me what you think that Fuji did. Right. So overall the Fujifilm X100V it is just so much fun to hold in your hands and see what comes out of it and really get something out of the camera that you can be happy with that you're in control of rather than just getting a blank slate and then trying to create something within lightroom. And I think that the Fuji X100V is finally ready for both personal photography as well as professional photography.
Raymond (10:56): So I put a link in the description below for you to pick up the X100V on Amazon. If this video helped you decide whether or not the X100V is right for you. I really hope that you enjoyed this review. Let me know what you think about the camera. Just give me your thoughts. I mean this is really, photography is, it's, it's, it's very much a community, you know, and being able to talk about these things. It isn't always just about specifications. Sometimes it's about what camera's right for you. There's a tool for personal and professional use. I really think that the X100V has has finally has finally reached that point. So again, let me know what it is that you think in the comments. And that's it. Guys, I will talk to you next time.
Enjoy the videos and music you love, upload original content, and share it all with friends, family, and the world on YouTube.
Luminar 4 is the newest RAW photo editor announced from Skylum Software and it promises a host of new features in Luminar version 4 including using artificial intelligence to help speed up your editing workflow.
Luminar 4 has a host of new and interesting tools available that uses revolutionary artificial intelligence technology to speed up editing times. In this review video (using the beta release of Luminar 4) I test out some of the latest features announced below.
Sky replacement was previously a time intensive task. No longer. In 1 click this tool can transform the mood of your image
Achieve revolutionary control of your portait images with no timely masking.
AI automatically detects the human face to allow a single slider to transform your portrait from boring to amazing.
Content aware technology makes the important part of your images pop.
Control many complex adjustments with a single slider to achieve the realistic results every photographer looks for.
Create realistic sunrays in your images that with amazing precision can interact with objects like trees and buildings.
Sophisticated yet easy to use tool that preserves both color and detail information for your image.
I have spend a few days with the newest release of Luminar and can tell you the features and use of artificial intelligence is incredible but in a logical way. Luminar will give you as much or as little control as you want. Luminar 4 wants you to grow with it and I can definitely recommend it for multiple reasons.
Skylum Luminar 4 is a one time purchase as a very low price. Once you download Luminar 4 on your mac or pc, it is yours to keep.
Artificial Intelligence is a feature that has never been used before in such a smart and logical way. Couple that with total control of the image is innovative and a joy to use especially when you want to edit landscapes and do portrait retouching quickly.
Skylum Luminar software keeps your images on your computer and are not uploaded to a cloud server to be analyzed.
Disclaimer: The transcript was transcribed electronically by Temi.com and may contain errors that do not reflect accurately what the speaker said. Because of this, please do not quote this automated transcript.
Raymond: 00:00 Hey Raymond here from the beginner photography podcast. And today we're going to be using AI to speed up our editing workflow. So let's get into it.
Raymond: 00:13 Hey Raymond here from the beginning of photography podcast and I have something very special for you all today. A few weeks ago, the company Skylab Software to makers of the popular photo editing software Luminar reached out to me to ask if I would try out their brand new offering, which is Luminar 4, which is the followup to their popular Luminar 3. Now, as the host of the beginner of photography podcast, I can tell you that one of the biggest complaints that I hear from new photographers is that they don't want to pay a monthly subscription for a service to be able to edit their photos. And Luminar solves that by being a one time purchase and then you have access to it forever. But what's really interesting is that now they've gone above and beyond by introducing artificial intelligence to help you speed up your editing workflow. So today we're going to get into some of the new features within Luminar and how to use them.
Raymond: 01:12 And yeah, it's, I got to tell you, it just, it just incredible stuff. So let's go ahead and get on into this. So this is Luminar 4 right here. This is the library of, of Luminar 4 so within here, and you can, you know, you can import your photos right here. You can see all of your folders here off to the side. And I've had some time to play with a lot of these photos. So Luminar 4 has really stepped up their game in a few key areas, right? And they all revolve around AI and how they can make your photos better, or maybe not better, but just achieve the result that you're looking for faster while still having a lot of control. So those main areas are, and this is super exciting, AI sky replacement is number one. Number two is its work with AI when, when editing portraits.
Raymond: 02:04 And then also just using AI to enhance the overall look of a photo. Just automatically, right? So what Luminar has done is that they have taken hundreds of thousands of images. They put them into a computer, they've told Luminar what looks good and what does not look good. Like what is the acceptable range of not enough and way too much. And then within that, these are acceptable parameters. And then it lets you get there fast. So let's go ahead and look at some of these things. So this photo right here is of a barn from a wedding that I shot last year. And the day was beautiful. It was a hot day, super hot, but the sky is, you can see was very boring. And unfortunately, as I said, with a boring sky, it really doesn't have the photo stand out. So let's go into the edit module of Luminar 4.
Raymond: 02:58 So as you see, they've broken up you know what you can do into four different sections. So we have the essentials, which is everything like lighting and color and details. I've been there is also creative, which we're going to get into in just a second. Then they also have an entire section just for a portrait. And then pro, which gives you all of the flexibility in control that a lot of professionals want when it comes to editing. So let's let's just go down to a creative first because I really want to talk about AI sky replacement. I really think that AI replacement is going to help make a lot of boring photos, a lot more interesting here in the future. So as I said, the majority of this photo is an empty sky. And my plan when I was taking this photo was to mask out the the, the trees here to just isolate the sky and then replace it with something a little more interesting.
Raymond: 03:54 And I ended up not doing that because as you can see over here, I mean, just the amount of tree detail and space in between the trees. Like you'd have to mask all of that out. And to tell you the truth, I'm not super proficient in Photoshop and this would take me like two hours to get done. And you may be thinking like, that's ridiculous, but for a lot of people this would take a long time to fix. So I was super excited to try this photo in particular with AI sky replacement. So let's go ahead and check this out. So under there's, there's the, the first tab right here is AI sky replacement. So it's very easy. The first thing that you do is you select your sky. So let's just pick something. I know that this is, you know, like midafternoon the light is kind of boring, but let's see what a dramatic sunset would look like.
Raymond: 04:44 So I'm just gonna pick dramatic sunset number four and immediately. This looks pretty good. It definitely looks more dramatic, but it almost looks as if a you know, a tornado or something is coming, but right away you can already see that we'll do a before and after, right here you can see the detail that it how good of a job it does while masking out the areas of the sky behind the tree and not affect the tree. Right? So we are just going to pick another sky though. Maybe I'll pick a dramatic sky number one and look at that. There you go. Immediately one click, right? I pick the right sky and now I found a a, a sky that I liked that gives the photo a lot of a lot more visual interest in that is what we're going for.
Raymond: 05:31 And photography is visual interest. What is going to grab your attention in a photograph? And here, watch, I'm going to show you this. This is the really cool thing about Luminar 4, and it's AI sky replacement is that it doesn't just replace the sky, right? Anybody can replace the sky in Photoshop. But what Luminar 4 does is it takes it one step beyond by using its AI technology and it adjusts the color for the rest of the photo depending on the sky. So as you can see right here, once we put a sunset in the, a photo of a sunset has a lot of warm colors to it. There's a lot more contrast in the photo. So what did it do to the trees? It warmed it up. It added a little bit of contrast right there and what did it do to the barn itself?
Raymond: 06:19 Once again as if the sky was really sunset and nice and warm sunset, it warmed up the colors of the barn and added a little bit more contrast. That is something that you could not do in Photoshop in just a few clicks. And that is why this is so exciting because instantly you can transfer form a photo with one click. Now I'm going to be honest with you, while I love the look of this, it doesn't look a hundred percent accurate. You know, if I was being the perfectionist that I am, you know, if I look over here, maybe the colors aren't the same, it's just a little bit the sky red here is a little bit too much. Well, luckily Luminar 4 gives you the option to to tweak the background even more to get the photo exactly how you like. Now I'll go back to the right photo here.
Raymond: 07:14 Now it gives you a lot of options with horizon blending the positions or you can change where the sunset is. And then as I was saying how it relates the entire scene to fit the sky, you can change the amount that it re lights the scenes. So see if I make it all the way, look at the difference in the barn right here in the trees. It is it's night and day. It is night and day right there. So I don't really like it that much. I'm gonna bring it back down to about 20. Just something nice and subtle. But one thing is that those clouds are so far away and yet they're still like perfectly in focus. Something about it just kind of messes with my brain. So what I'm going to do is I'm just going to change the defocus of the sky.
Raymond: 07:57 Just a one, just a one, just very, very minor. Now you can go all the way to a hundred if you wanted to. If you had something like a closeup portrait and you really wanted this guy to be you know, out of focus in the background. And even this doesn't look as terrible as I thought that it would. Luminar 4 did a great job of really putting a limit to what looks real and what looks fake. So I'm gonna bring that back down to one though. Just enough for you to tell that it's out of focus so that it doesn't take, it doesn't take attention away from the barn here, but enough to where you can still see that it is a beautiful, beautiful sky. So that is a AI sky replacement on this photo right here. But now I want to show you something.
Raymond: 08:41 Awesome because here is another photo same day, same location. And I really wanted to look at the sky here now cause there was, this was one of the very few clouds there that day and there really wasn't a lot going on, but I knew that I wanted some color. I wanted a photo with color. And I wanted the, the barn feel, right? So we used the silo right here. Now as you can see in this photo, we have string lights and the string lights. There is a lot of very small details. And if you look right there in the photo, you can see that it for one is out of focus, which for Photoshop is very hard to mask if you're doing it by yourself. And like with the selection tool because the difference between where that ball is and where it's not is very, very very, very small.
Raymond: 09:32 That difference right there. So I was excited to see what AI sky replacement can do here. So let's pick a, just a dramatic sky. We'll just pick dramatic sky too and we'll see what happens. Okay. Whoa. Dramatic sky too. That is definitely very dramatic. And I don't really like how it looks though. Maybe just dramatic sky one. Okay. Yeah, this is fine. So as you can see, it's still retains almost all of the information in the bulb itself right now. I don't know if you can see that because I'm just using screen capture software right here, but I can still see the outline of the bulb. And if there is something that you don't like about the photo, again, you can adjust it here in it's settings. You can change how it relates. The scene, you can change the, the sky global, which is how it affects the rest of the scene, right?
Raymond: 10:25 So if you turn it all the way down, it goes back to the original sky and then it just how much of the sky it actually takes up, right? And then you can also close gaps, which doesn't really help too much here, but it would help a lot like in tree situations. And then once again, you can defocus the sky if you want to bring that up to one, just enough to make it look natural to your eyes. And that is it. That is why this is such a great program because this was done in like technically one click. And then I just went in and started messing with all these sliders right here. But I did not need to. Now remember how we talked about how when you upload a photo of the sky, it will relight the entire scene, right?
Raymond: 11:10 So we've seen what happens when you upload a photo of the sunset. We've seen what happens when you upload a photo of a dramatic sky. There's, it's a little cooler. It's a little less contrasty. But what happens if you load your own custom sky image here, I'm going to go to the desktop and upload a photo of the Milky way, right of a nighttime sky. If you look at this photo right here, this was taken in the daylight. It's was going for a high key thing. Didn't work out as well as I was hoping for. But again, the sky very bland and boring in this photo right here. So all I'm gonna do is just upload a photo of this Milky way and see what happens. So let's go ahead and wait for that to update and boom, Whoa. First of all, even though this may not look absolutely perfect, you can see that the trees back here were out of focus.
Raymond: 12:05 While the stars are perfectly in focus and that doesn't make a lot of sense. The job that it does really lighting this scene is phenomenal. Let's do these side by side. Right here you can see in this side there's more purple in her dress. It is a little cooler and a little it just adds something that honestly I can't even describe. I don't know if I'd be able to edit it. I don't know if it's a little extra. You know, if it brings down the highlights or what it does, but the result looks pretty convincing, pretty convincing. If you were to, you know, take this photo at night, now you can, you know, do an even better job by tweaking this even more. You can defocus the sky a little bit even by just one and that's technically zero right there. Let's see.
Raymond: 12:54 So bring that up to just one, right? So you lose a lot of stars that way. I actually don't want to do that, right? I want to leave it at zero. But what I want to do is maybe work on closing the gaps here. We'll see if that helps bring that all the way up and see what that does. That definitely helps a lot here in the trees. But you can edit the mask with this button right here. You can go in and you can change the mask to get even more precision done. And that is what makes this program once again, so exciting to you. She's the possibilities that you can do. Now. You wouldn't do this for every single wedding photo of course. But for certain portraits, for stylized photos, you can really stretch your creative muscles with Luminar 4, and again, I can't wait to dive even deeper into this and this is just a pre, this is, you know, not even a production release of the program yet.
Raymond: 13:52 I cannot wait to see what happens in the future. So that's kind of my wrap up of AI sky replacement, a lot of awesome features. I want to know, where would you use this most? Just leave a comment below and let me know. Okay. So next that we want to talk about. One of the next big things that Luminar 4 is introducing by you know, using AI in the program is it's focused on portraits. So I have a senior photo right here that I took of my wife's nephew. I'm sorry, my wife's cousin Jake and we are going to go ahead and play with this a little bit. So let's go ahead and zoom in on his face right here. Now remember how off to the side, we have a few options. We have essential creatives and portrait. So I'm going to go straight to portrait because that's exactly what I'm going to be working on here.
Raymond: 14:42 So within portrait we have a few options AI sky enhancer. So let's just go to AI sky enhancer. So now you'll see that it's a, a, a slider from zero all the way up to a hundred. So let's see what a a hundred does. Just in case you can't see, I'm going to zoom in to 200% just so that you can see the difference in the skin. So it's really like looks porcelain looks glossy. It doesn't look too appealing. But once again, I think that Luminar does a fantastic job of stopping you from abusing its power. It really looks, you know, better than what you could do with a few simple tweaks within a Photoshop. But now let's go ahead and click the single button AI skin defects removal. So what it does here is it's going to use AI to look at the skin and then figure out what the defects are and then remove those.
Raymond: 15:37 So once again, before, after. So it removed all of his blemishes and in fact it also removed some molds and just like natural skin you know, natural things that Jake has on his skin. And that case, I don't really like it that much. But again, you have the control. You can edit the mask right here. You can bring down the slider, you can remove the AI skin defects. So we'll just bring this down to zero again. So this was the before. And then I'll slowly bring it up until I just get to a point to where I think that it looks natural and still smooths it out just enough to where I like it. I think this is it. And again, it's not too much. It is not too much. So that looks good. Now we're going to go down to a portrait enhancer.
Raymond: 16:24 Now if you know anything about portraits, there's a lot of things that you can do to the human face to make it look more appealing. But when it comes to seniors, seniors are very you know conscious about their skin and how they look. So you can be really fine tuned here to make them look their best. So the first thing I want to look at is the face light, right? Your eye naturally goes to whatever the brightest object in the frame is. So you're gonna want to add light to his face. So let's go ahead and just add a little bit of light here with a slider. And let's just go all the way up. Again, the fact that his face isn't totally blown out and the slider is all the way to 100 just speaks to the volumes of how Luminar 4 doesn't let you abuse a photo, which is great, but I'm gonna bring this back down and then slowly work my way up.
Raymond: 17:10 We just want a little bit of a pop, right? I'm gonna stay right there at about 38 39. Now we have more options here. We have eye whitening and was eyes weren't all the way open, but you can, you know, go overboard with it. I'm actually not gonna touch that much at all. And then there's I enhancer. What I enhancer is going to do is it's going to raise some of the shadows around his eye and bringing a little bit more color in contrast. And you can go up pretty high with this thing. And I think that that looks pretty good right there. We can it will focus just on the dark circles of his eyes. And again, this is just a slider. We don't have to do any sort of masking. We don't have to use any sort of brush to a one quick slider and it's done.
Raymond: 17:48 Now Jake has a pretty athletic face so we don't need to slim his face, but we have the option here too, right? So we'll bring it in and then it just looks weird on Jake. But one cool thing is that you can also enlarge the eyes. So let's bring that all the way up. Definitely larger. But it's not crazy, right? But I am going to, I'm going to leave that at about 60% because I think that that looks pretty good and a lot more compelling than what it was. We can play with the eyebrows here, which is gonna make them a bit darker, add some more contrast. That looks good. Now Jake here has very red lips so we can adjust the saturation. We don't want to add any more saturation, cause again, they're already pretty red. We don't want to add any more redness because they're already pretty red.
Raymond: 18:30 But we can dark in the lips just a little bit. There you go. To make them look, you know, take less of the focus away from the lips and bring them more to the eyes. And then you also have the option to whiten teeth, which Jake's teeth aren't being shown here. But you have that option. So this photo right here, it doesn't really look that amazing, right? It doesn't stand out that much. And that is okay. That is good because you don't want your editing to distract you from the photo itself. So let's come back here and then let's just go ahead and turn this off, right? We turned that off. Suddenly you see a difference, don't you? We turn that back on and now you realize that your eye goes right to Jake's face. And that's, that's the whole point of what it is that we're trying to do here.
Raymond: 19:15 So let's go ahead and look at a, a, a true, you know, a closeup portrait and what you can do with a closeup portrait. And now this was at a wedding that I shot just a few months ago. It was very rainy day. So we got in front of a big, large window, nice soft light. As you can see, it wraps around and this was the photo that I got. Now oftentimes when brides when they're not used to being in front of a camera, they just put on a smile that they are used to, right? And sometimes when you smile really big, it makes your cheeks larger. And when it makes your cheeks larger, it makes your face look wider. So this is where that slim face option comes in and can be really helpful. So first off, let's just go to AI skin enhancer and we're gonna bring this up and we're going to see what this does because she already doesn't have many blemishes on our face to begin with.
Raymond: 20:13 So we brought this up about, you know, 40, we're going to bring this up to half and see what this does right already though, you can still see the pores and her face and that is the sign of like good versus bad. You know, face skin smoothing because regular, just skin smoothing is going to remove those pores. So we're going to turn that off and we're going to turn it back on. Yeah, it is super subtle, but it really, really makes a difference here. Okay. So we're going to be done there. Then we're going to go to back to portrait enhancer. I'm going to bring just a little bit more light on her face to hope that it brightens up the shadows over there, which by the way, I can still go into my essentials, go into light, and then adjust my shadows any way that I want to or even go into pro and do the exact same thing with more fine tuned details and adjustment.
Raymond: 21:03 But I'm just going to work in the portrait area right now. So we have red iron removal. Not a problem. I whitening, you know, you can bring that up just a little bit. I enhancer once again, it's gonna remove some of the shadows under the eyes and, and bring up the contrast in the colors of her eyes. And then same with the dark circles, a remover. We're going to bring that up and that's just going to bring light in from under the eyes. And now slim face. Let's see what this does. That's going to bring her face in, in a really tone down those cheekbones that you get from making that nice wide smile. And already I can tell this looks a lot more natural to who she was as a bride. And then you can also enlarge the eyes. So we don't wanna do this too much because when you know, you, you smile big and you kind of squint and then you enlarge those eyes.
Raymond: 21:53 It can look fake real quick. But I think that that looks good because of the light. It takes away some of the pop from her eyebrows. So we're going to bring that up a little bit. Now her lips here could use, this is a situation where they could use a little bit of saturation, a little bit of redness. We can bring that all the way up if we wanted to. And that judge, that just looks too much. So I'm going to bring that back down. It's just very, very light. But we don't want to darken the lips, but we can add some teeth whitening here and then get in nice and close here. We can even, we can go all the way. See what that looks like.
Raymond: 22:29 Yeah, that's not, that's not crazy. That's not crazy. That's still looks pretty natural, but I'm going to bring that down. Okay. Now we're going to come out of here and then we're just going to look at a before and after. And as you can see, look at the before and after. Which one would you rather have in an album and the end, it doesn't look unnatural. It doesn't look like who is that woman who, that's not me. This all looks very, very natural. And this was done in seconds, right? In less than two minutes. I have a portrait that her parents are going to want to you know, print out and put a large like above their, you know, their fireplace here took no masking or anything to do. Alright, so we've seen how AI sky replacement works. We've seen how the portrait enhancer works.
Raymond: 23:14 Now let's go ahead and look at just how AI can enhance a photo on its own. Now as I said, one of the big things about AI is that there are some security questions, right? Do we know how safe AI is? And in this scenario, I got the chance to talk with the chief technical officer of a Skylum Software who creates Luminar 4 and ask him about the safety specifically of our photos. What I was told is that for AI, what Skylum did is that they gave Luminar 4 hundreds of thousands of photos to look at and then it gave it parameters as to what was good and what was not good. And then it took that algorithm and then put it within the software of Luminar 4. So at no time does it ever take your photos, upload them to some server to analyze, and then make decisions based on that. Your photos stay on your computer.
Raymond: 24:10 And that is super important to know. If you're dealing with sensitive photos or you just don't want to deal with, you know, any sort of information lost. So with that being said, let's look at how AI has you know, how it can enhance our photos and just speed up our work flow. So as you can see, this photo right here, we can look at the history. I'm up here, it is already underexposed and I shot it under exposed. Because I still want to detail in the sky up here, wrong photo because I still want to detail in the sky up here and I want detail in a V dress without blowing it out. So I purposely underexposed this photo. Now maybe I underexpose it a little more than what I needed to, but let's see what AI enhance says.
Raymond: 24:57 So from here we got two sliders, AI accent in AI sky enhancer. So there's really not much sky in this photo. So we're just gonna deal with AI accent first. So we're just going to go ahead and slowly start to bring this up. And I can already tell that what it's doing is, for one, it's brightening up the exposure, which we can see up here in the histogram. It's bringing up the exposure as well as trying to keep the contrast down. But it's having a hard time. I mean there's a lot of colors here, so it brings up a lot of contrast. And I also believe that it has warmed up the photo just a tiny, tiny, tiny bit. Now looking at this photo, I like the look of the flowers. I like the look of the background, but I believe that the skin is just a tiny bit too orange for my taste.
Raymond: 25:40 So one thing that I can do for granular control is I can go into color, I can go into advanced settings and then I could pick orange, right? And now cause that's about the color of her skin. That's where it's going. And just to show you, we can turn the luminance all the way down so that you can see that it is affecting the skin. But one thing so I don't want to affect the luminance. I just want to effect the saturation. Just bring that down a tiny bit so that her skin doesn't look so out there. And I think that that is enough right there. So there we've used AI enhance to effectively take control of the image. And still I found something that I didn't like. So what I did was I just changed the color on my own.
Raymond: 26:25 Now going even further, there's also this AI structure option and what ad structure says that it does is that it you know, enhances the structure of the of the photo. So I guess that that, that wasn't really helpful, but things like small, it will bring out the, it'll add some contrast, it'll just make it pop without effecting the human. So the AI that Luminar 4 uses has looked at this photo, used computational photography technology, and has deemed this a person right here. So when I change the slider it, she will not be affected at all. So let's just turn it all the way up so you can see what it does. So let's see. We'll wait for that. And there you go. So it has affected the dress because there is details and structure within the dress, but as far as the skin goes, we'll just go ahead and look at this.
Raymond: 27:21 I guess that is the the, the, the before and after. So that's not going to help too much. So I'll take that off. Let's just go ahead and turn this off and turn this back on. It's not affecting her, it's not affecting the skin or anything like that. So we're going to turn that back off. We're going to turn it on and now it looks definitely looks more HDR, so that's too much. But again, you just add a little bit of a pop and then you can add some boosts. Let's see what that does. It just six. Yeah, it's more of a color thing as well. So we'll bring that down and look at that. To me, I think that that looks like a great photo. And again, done with let's see, one slider two, three and then four, five clicks. This photo went from, you know, before to after fantastic results.
Raymond: 28:13 Okay. So let's go ahead and look at some of the creative options that a Luminar 4 has introduced, aside from just AI sky replacements. So we obviously have AI sky replacement. One of the cool things is a new option called mystical and mystical. Let's go ahead and look at this. So within mystical, what, what is what, how would you describe mystical? Like if you were to edit a photo in a mystical sense, how would you edit it? It's hard to put into words, right? It would be kind of soft, it would be kind of dark, but it wouldn't be underexposed. So how would you describe it? It's very hard, but now you can add that just a little bit of mystery to your photos with just one slider. So I'm going to take this slider and bring it all the way up. And as you can see some softness, it has warmed up the overexposed like sun area right here, while still bringing in a little bit of contrast and brightness to the shadows.
Raymond: 29:05 And now you can also adjust the shadow so you can warm up the shadows if you want to, which does introduce a little bit of a, you know, color change. But I don't want to, I want to believe that all the way down here. And then I'm going to go back into essentials. I'm going to go to AI, enhance and I'm going to see what AI enhanced can do. So I like it. Again, it's a, it's brightening up the photo just a tiny bit. There's a little too much saturation for me, technically vibrant, so I'm gonna bring it down. The vibrance, specifically in the greens, we're going to bring down the luminance of the green and the saturation of the green just to make it a little bit more natural or at about bear. And now also in creative, we have the option to add sunrays.
Raymond: 29:50 Sunrays why would you think like what are you going to do with sunrays? There's plenty of reasons why you would use sunrays and when you have a photo, like this is a good composition. You like the color, but it's just missing something and you can't really do AI sky replacement cause there's just so many trees and there are so out of focus that this is a situation to where it wouldn't work. Again, it's not a miracle worker. And in this situation it would just look terrible anyway. You're not going to get any sort of detail out of the sky. Let's try sunrays right? So let's go ahead and place a sun. So we're going to say that the sun is right about here and we're going to up the amount. Okay? We're just going to go all the way to a hundred. Well, way too much clearly, but not so much that you're thinking to yourself.
Raymond: 30:33 That's too much, right? I mean, I guess technically too much, but not, you know the, the photo was ruined. So we're just going to bring, you know what? I'm going to keep it up because I like, I like how strong it is. Okay. I'm going to bring that right there and I'm going to, now we have options for a overall look. Sunray length and penetration, right? We can see that we have a trees back there and right now it almost looks as if the sun is in front of those trees. So let's see what happens when we play with the penetration. Yes. So you can send it still behind the trees. So right about there, it still looks natural and yet it looks like the light is coming through the branches rather than in front of the branches. So with just a few clicks, I mean we've gotten really fantastic results right here.
Raymond: 31:20 And again, you can adjust even the which is really granular, you can change the sun's warmth as well as the sun rays warm. So you can bring down the sun warmth, but really boost that Sunray warmth right there. And as you can see, I mean that really looks stylized right there. This is the kind of photo that you would print out and hang in your house. This is not the kind of photo to where you just make all of the photos look like this. This is a, this is a piece of art, you know what I mean? So when we talk about the difference between, is this a creative or is this cheating? I don't think that it's cheating. You know a hundred years ago people thought that if you cropped your photo, you are cheating because that's not how the scene in front of you looked.
Raymond: 32:06 And there's merit to that, right? If you're a documentary photographer, you really don't have much that you can do to your photos and still remain and still keep that integrity to point. It comes to creating a piece of art through your photography. I see no reason why you can't add some flare. Why you can't make it look more mystical. Why you can't replace the sky? Because these are simply tools. You don't have to use these tools. I have a hammer out in my garage, but I'm not going to use it if I'm going to, you know, change the tire, my car, just because I have the tool doesn't mean that I have to use it. But in a situation where I need to hang a picture frame, I'm going to use that hammer and in a situation where I want to create a piece of art, something unique, something creative for my clients or for myself, I'm going to be using every single tool that I can to achieve the results that I want.
Raymond: 33:01 And I don't think that that is cheating it. Now, if you're saying that this is how it came out of camera, that's cheating, that's wrong, but that's up to you to create, right? We see photos all day, every day that are manipulated in Photoshop, and it's not, it's just simply art. It's somebody's vision that they wanted and that they create. So I don't think that this is cheating. I think that using AI in photography is going to be a great way to speed up the editing process. It is going to be a great way to just save us so much time just to do the the tasks that we don't want to do. Right? The masking around the face, the things that aren't creative, this frees you up to be more creative. And for that, I am really excited to see where Luminar 4 can take my photos.
Raymond: 33:52 What, Luminar 4 can do for your photos as well. So if you are interested in Luminar 4 what I want you to do is click in the description below where there is a coupon for $10 off your purchase if you check it out. Now that is with all transparency and affiliate links. So if you do decide to purchase Luminar 4 if you think that this is the right decision for you and for your style of editing and photography, then I will receive a commission. If you do decide to purchase the product. But that is it. I want to know your thoughts. Are you going to be picking up Luminar 4, and if so, for what? Where is it gonna save you the most amount of time? Is it just the AI enhanced to you know, bring up the quality of your photos quick? Is it that the AI sky replacement or is it for working with portraits? Where do you see working with Luminar 4 is going to be the best for your photography? Leave your answer in the, in the comments below. It's onto the description in the comments below and I'm really excited to hear what you guys think. So that is it again, Raymond here from the beginning photography podcast, and I will talk to you soon.

If you’re just getting into photography there are a lot of new terms you may hear that are confusing. This is a list of photography terms for you to reference from to help you grow.
If I missed a term or if you have something to add onto an existing term, please leave a comment below! This list if for you and as a community was can make it the best and most comprehensive list possible!
Ambient Light - Availible light hitting your subject. No Flash or external lighting.
Aperture - The diaphragm inside of your camera lens to control how much light passes on to the sensor
Aperture Priority - A semi automatic camera shooting mode that lets you choose the aperture while the camera chooses the rest of the settings to expose your image
APS-c - The technical name for the Crop sensor standard
Articulating Screen - A digital screen on the back of your camera that can tilt up or down, left or right to get make it easier to get a unique angle
Aspect Ratio - The proportion between heigh and width of an image
Astrophotography - Photographing objects in space like stars
Back Button Focus - Assigning a button on the back of your camera to dictate when to focus rather than using the shutter button
Bit Rate - The rate as which your camera can communicate with your memory card
Blown out - When a portion of an image is so bright, there is no more information that can be saved
Bulb - Camera shooting mode what will keep the shutter open as long as you hold your finger on the button. Useful for long exposures
Blue Hour - The hour after sunset when the ambient light is a rich soft blue
Bokeh - The term for the out of focus elements in a photo
Boost Levels - Artificially raise the exposure in editing
Bracketing - Taking a series of photos, typically 3 with different settings to ensure you captured all image correctly
Burst Mode - A setting that allows the camera to take multiple photos per second while the shutter button is held down
Camera Modes - Different shooting modes that let you tell the camera how much control to have while shooting
Camera Shake - When your image is blurry, not because it is out of focus but because your shutter speed was too slow that the camera movement was captured in the image
Canon - Camera manufacturer
CF Card - A type of memory card mostly used in higher end cameras
Chimping - When you look at the back of the screen after taking a photo
Clipped - Similar to Blown Out, referring to the histogram readout showing where the information is lost
CMOS - Most common type of digital sensor
Cold Shoe - Slot on your camera to mount an accessory that will not communicate with the camera
Color space - Mathematical model that describes the range of colors an image can capture
Composition - How a photo is composed to make it more compelling. Common compositions are Leading Lines, The Rule of Thirds, and Visual Weight
Chromatic Aberration - When the elements inside of your camera lens are just slightly off they produce a red halo effect in your image under high contrast conditions. Typical of lower cost / quality lenses
Crop Sensor - Common sensor type used in the majority of entry level cameras that is smaller than Full frame sensors
Depth of Field - How much of your image will be in focus. Depth of Field or DOF is dependent of 3 elements, Focal Length, Aperture, and Subjects distance to camera
Digital zoom - When an image is Digitally enlarged to appear closer to a subject as if zoomed in
DPI - Dots Per Inch. A term used when printing a photo to decide how sharp the image will be.
DSLR - Digital Single Lens Reflex. Common type of digital camera typically has an interchangeable lens.
Dual Card Slot - When a camera has 2 memory card slots. Used for safety in the event of one memory card failing
Dynamic range - How many variations of light from black to white a camera sensor can pick up. The higher the Dynamic Range the better.
EVF - Electronic View Finder.
EXIF - Exchangeable Image File Format captures data about an image and embeds it into the image itself. Things like the cameras settings, copyright, description, and even location can be saved to the photo in the EXIF data
Expose to the Right - When you photograph you images brighter than a proper exposure. The RIGHT refers to the bright side of the histogram
Expose to the Left - When you photograph you images darker than a proper exposure. The LEFT refers to the dark side of the histogram
Exposure - How bright or dark your photo is.
Exposure Compensation - Used in automatic shooting modes to tell the camera to make a photo brighter or darker by a specific amount
Exposure Triangle - a teaching term to describe how to achieve a proper exposure using 3 camera settings. Aperture, Shutter Speed, and ISO
Extension Tubes - Piece of gear placed in between your camera and your lens to increase how close you can focus on a subject. Can turn a standard lens into a macro lens
Fast Glass - A lens with a wide aperture. Something like f1.2- f2. Called fast because it can take in a lot of light so its useful in dim situations, you can shoot fast without having to set up lights.
File Format - The type of image file your camera records.
Fill Light - Additional light used to brighten up the shadows of an image
Filter - An accessory you place in front of your lens to change the appearance of an image or how light enters the lens.
Fish eye - A type of lens that distorts the image to create a spherical creative effect
Flash - External light used to add additional illumination
Flash Sync - The fastest shutter speed your camera can still communicate with your flash
Focal Length - The magnification of your lens measured in millimeters
Focal Point - The predominant subject in your photo. Where you want a viewer to look in an image.
Focus Peaking - A digital tool used to help you nail focus when quickly when you are adjusting your focus manually
FPS - frames per second, in photography it measures how many photos you can take in a second
F-Stop - Synonym for Aperture. You can say “Aperture of f 2.8” or “An F-stop of 2.8”
Fuji - Camera Manufacturer
Full Frame - Standard digital image sensor size that matches the size of a frame of 35mm film
Full Manual - Shooting mode where you are in total control of the camera and it’s settings. The camera makes no decisions on its own.
Glass - Synonym for Camera Lens
Golden Hour - The hour before sunset when the sun is low in the sky creating an orange and golden glow
Grey Card - A grey colored piece of cardboard used to determine exposure and white balance. Not used in photography much anymore.
Hard Light - When a light has a hard edge between light and shadow. Not very flattering for portraits
HDR - High Dynamic Range. When you stitch several photos of different exposures together to create an image with more color and light detail than the naked human eye could see.
High Key - When the light illuminating your subject is very bright
Highlights - One of the brightest points of an image
Histogram - A digital tool to measure the amount and intensity of light in a frame.
Hot Shoe - The mount on your camera to attach your flash so it can communicate with your camera to fire when you take a photo
Hybrid Camera - A Camera that can also be used for Video
Hyperfocal Distance - The maximum distance that objects in your frame are within an acceptable amount of focus
IBIS - In Body Image Stabilization. A camera that has a sensor that adjusts to counteract your hand movements to produce a smoother image
Image Stabilization - An element within a camera lens that reduces the amount of camera shake captured by the camera creating a sharper image.
ISO - The Sensitivity to light of your camera sensor. Typically ranging from 100 to 6400
JPG - Compressed Image File Format most commonly used to share photos online.
Kelvin - The unit of measurement for the color of light. Used to define your white balance
Kit lens - The lens that came bundled with your camera. Typically lower quality than other lenses on the market
Leaf Shutter - A shutter mechanism inside of a camera lens. Common in medium format cameras
Lens Distortion - When a lens creates curved or non straight lines in your image. Common in objects that are near the corners of your image
Lens Flare - When light bounces around inside your camera lens to create a red or yellow artifact that you cant see with your eyes
Lens Hood - Plastic or metal hood mounted to the front of a lens to reduce lens flares
Lightmeter - measures the overall intensity of a light source
Long Exposure - Using a slow shutter speed to increase the length your image is exposed for. Used in night photography and creative uses to blur waterfalls or clouds
Low Key - When the main light illuminating your subject is dim
Macro Lens - A lens with a very close focusing distance to magnify an object
Manual Focus - Choosing focusing your camera lens to get your subject in focus
Medium Format - Refers to the size of the sensor. Larger than full frame, smaller than large format.
Metering - measures the brightness of your subject. Most cameras allow you to change how a scene is metered
Micro 4/3rds - Standard digital image sensor size used in olympus and panasonic cameras
Mirrorless - A camera that does not use a mechanical mirror to flip up and expose the camera sensor. This allows cameras to be smaller, lighter, and have faster autofocus
Moire - When a pattern or design is so small your camera sensor can not resolve it when photographed and causes a strange looking wavy pattern
ND Filter - Neutral Density filter. Cuts down the amount of light allowed to enter the lens
Nifty Fifty - The 50mm 1.8 lens both Canon and Nikon sell for an extremely affordable price making it the perfect first lens
Nikon - Camera manufacturer
Noise - When your cameras ISO is too high it can cause visible digital noise or grain in your image
Olympus - Camera manufacturer
Optical zoom - True zoom. When your lens moves to magnify an image
Orientation - Either up and down (Portrait orientation) or side to side (Landscape orientation)
Overexpose - When your image is exposed for too long causing it to be excessively bright
OVF - Optical Viewfinder
Panasonic - Camera Manufacturer
Panning - Moving your camera from side to side
Perspective Distortion - When your perspective causes your subjects features to be distorted
Photog / Tog - Shorthand for photographer
Pixel - Tiny square on your camera sensor that records color. 1 million pixels = 1 megapixel
Point and Shoot - Type of camera typically will limited controls and no interchangeable lens
Polarizer Filter - A filter that blocks and refines certain waves of light to darken skies, manage reflections, and suppress glare from windshields and bodies of water
Post processing - Editing
Prime / Fixed Lens - A lens that does not zoom.
Rangefinder - An interchangeable lens camera without the flip up mirror to view through the viewfinder. There is a separate window to compose and focus your image through.
RAW - Image file formate that retains all of the information captured by the image sensor.
Rear Shutter Curtain Sync - When your flash fires at the end of the exposure rather than the beginning. Offering a creative look
Reflector - A tool used to reflect light from one source onto your subject
Remote Shutter - A shutter button that allows you to take a photo without touching the camera. Useful for long exposures when the act of pressing the button on your camera can cause enough shake to ruin the image
Resolution - How many megapixels a camera has
SD Card - The most common type of camera memory card
Shutter speed - Controls the length of time light is exposed to your camera sensor
Soft - Slightly out of focus
Soft Light - A quality of light where the transition between light and shadow is gradual and not sharp
Sony - Camera manufacturer
SOOC - Straight Out Of Camera. An unedited image.
Speed Booster - A tool used to fit the image of a full frame lens onto a cropped sensor
Spray and Pray - When you take many photos without intention and hope that one turns out good
Shallow - When little of your frame is in focus
Standard Lens - a lens with a focal length between 45mm and 55mm. It offers the closest image compression to what our eyes naturally see
Stops - a measurement of light
Strobe - a type flash designed for the studio and not to be mounted on your camera
Teleconverter - A tool that magnifies the image of your lens to get closer to far away subjects
Telephoto Lens - a lens with a long focal length (85mm or more) to see objects far away
Tilt Shift Lens - a lens that can tilt to change the plane of focus
Timelapse - A series of images taken at a set interval of time to capture an event that takes a long time to compress it down to seconds
TTL - Through The Lens.
Underexpose - When your image is exposed for too sort of a time causing it to be excessively dark
Upscale - Video term to enlarge the resolution of a video file
UV Filter - Camera filter that blocks out UV Rays
Viewfinder - Where you look through on your camera to view and focus your image
Vignette - Dare edges on your image
Watermark - a stamp of sorts with your logo or contact info made to deter image thiefs
Waveform - Video version of a histogram
White Balance - The color balance of light
Wide Lens - a lens with a wide focal length. Anything wider than 35mm
Wide open - When your lens is open to its maximum aperture
x-Trans - Type of image sensor used by Fuji Cameras
Zoom Lens - A lens that can zoom in to get you closer to your subject

Is your passion for photography strong enough that you’d like to make it your career? Great news: you can! That’s not to say that making money from your photos will be easy. Just like any other artistic pursuit, the path to becoming a working photographer is a tumultuous road paved with beginner's challenges that take time to navigate. But if photography is truly your passion, there are several things you can do to make sure you’re headed in the right direction.
One of the best ways to share your passion with other photography enthusiasts is by creating a blog. If you produce consistent, quality content, you’ll drive traffic to your site. You can use the website host Hosting Foundry and when your site has impressive an impressive SEO ranking, it opens up avenues for reeling in commissions, such as:
Ads – You'll get paid every time someone clicks one.
Referrals – This involves placing a link to an advertiser’s webpage in one of your articles. Just like with ads, you’ll make money each time someone clicks that link.
Writing Reviews - With this route, you agree to write an article hyping up a specific product or service that an advertiser offers in a review post. This is fantastic for those that enjoy the written word as much as they do photography.
Businesses, marketing agencies, and digital media companies are constantly looking for quality photos to put on their websites. They want them quickly and for cheap.
License your photos on as many major stock photography websites as you can (read the instructions carefully when you submit, some websites don’t allow you to license the same image across multiple platforms). Stock websites are an effective “middleman” for getting businesses to come to you.

No matter where you live, if your town has any sort of population, there are guaranteed opportunities to capitalize on just outside your front door. Get your name out there in your community by shooting photos for:
Special Occasions – Every year, people have weddings, graduate from high school, or experience some sort of momentous occasion in their lives. And all of them want to capture the moment with the perfect portrait.
Small Businesses – You and most small business owners are kindred spirits. You may be just starting out, but you believe in what you have to offer and are eager to reach more people. Introduce yourself to these small business owners and show them how you can help. Bring a tablet with your portfolio, or print your photos out on the best color laser printer you can find.
Newspapers – Digital platforms have smoked the newspaper industry so badly that this suggestion may be obsolete by the time you finish reading this sentence. But for the moment, newspapers remain a viable opportunity to get work taking photos of local events and public figures.
Today, everyone and their mother has some sort of social media profile. That means virtually countless people are eager to tap “follow” on profiles that brighten their day, making your potential audience larger and more accessible than ever.
Reach your audience by building a strong social media presence. Put particular emphasis on your Instagram page and your YouTube channel, where images reign as king.
In order to be the best, you have to learn from the best. Build your resume by introducing yourself to established photographers in your area and offering to assist them with tasks like:
Photoshoots
Editing and retouching their photos
Photography tours and workshops
Sweeten the pot by offering to do your first assignment for free. If you do a great job, it’s likely they’ll call you again, and maybe even bring you onboard full-time.
Making money from photography takes time, so don’t expect to turn a profit from your photography right out of the gate. But if you follow these tips and stay persistent, you may be able to turn your passion into a profession that yields a serious profit.

Have you ever seen an absolutely gorgeous photo on Instagram with thousands of likes and wished you could take photos of your own that are just as beautiful? Perhaps this inspired you to save up for your own camera, just like the one your favorite photographer uses. As soon as you buy it, you bring it out for your first ever photoshoot. You start taking photos. When you get home, you review these photos only to find out that, well, they suck.
Don’t worry, bud. All photographers have gone through that stage. Although it may be difficult to imagine, your favorite photographers were also mediocre at what they do in the early stages of their career. That didn’t stop them from wanting to grow and improve their craft. That’s all there is to it: growth. They kept with it and eventually turned a profit from their photography hobby.
Top-quality digital cameras have become easier to acquire in the last decade. Everyone and your mom can purchase a DSLR or mirrorless camera capable of taking amazing photos at a relatively cheap price point. A lot of people own cameras but only a fraction of these people actually dedicate the time and effort needed to go beyond that dreaded amateur photographer phase. If you’re reading this article, then you’re probably in the right mindset. Here are some beginner photography tips to guide you along the way:
A lot of beginners want to try out so many things that it often overwhelms them. “I wanna shoot fashion and food and landscapes and streets and so many more things” is not the best mindset to have if you want to speed up your growth. Shoot around and try to determine what subject you want to stick with. Doing so will make sure you learn as much as possible in as little time as possible. To gain more experience fast I often recommend taking photos for free to build your portfolio.

Henri Cartier-Bresson, Richard Avedon, Ansel Adams, Annie Leibovitz -- do these names ring a bell? If they don’t, you’d want to look them up. These are just four names of what I would consider the titans of photography history. Dissect each and every photograph to see what they considered to be beautiful through their lenses, listen to online video essays detailing the intricacies of their work, watch interviews of them to see how their thought process is like. Sure, there are some superb photographers floating around social media nowadays, but as with any art form, you have to study the masters and build on what you learn.
The first thing a lot of beginner photographers tend to do is to think their skill level can be bought with money. They save and buy the newest cameras paired with the fastest lenses. When they start shooting with new gear, what do they get? The same forgettable photos but this time with a lot more sharpness and background blur. The fact is this: Almost all digital cameras nowadays, including the one on your phone, is capable of taking breath-taking photos that you just couldn’t a decade ago. There’s a saying that goes “The best camera is the one you have on you” and that couldn’t be any truer. A camera is only as good as the person handling it.

As personal as art may seem, you can’t deny that there is a social aspect to be tackled if you want to make it big in your chosen scene. Photography isn’t any different. It’s an absolute must to get yourself out there, whether that’s by marketing yourself the right way on social media or attending social events related to photography. You’re gonna want to grow your network as much as possible because this is where you will get most of your work from. A larger network of photographers can also mean a larger network of people you can approach to critique your work. When you have a network of other photographers it will become easier to sift through the noise of the photography industry.

There’s nothing wrong with trying to emulate the works of your idols. You may remember when photographers like Brandon Woelfel shook the scene with neon-lit portraits. After portraits like those spread like wildfire on Instagram and Pinterest, many amateur photographers tried their best to replicate the look. This is a great way to start off your photography journey but it’s important to try out new things. Experiment with different shooting styles, editing techniques, and maybe even mix formats. You never know what’s going to look good until you try. You can read all the instructionals and watch all the tutorials in the world but you can learn much more from trying new things out first hand (and learning from the mistakes made along the way).
This is the most crucial out of all the tips enumerated in this article. If there’s one mindset you just have to adopt to get better, it’s the ‘growth mindset’. It’s a way of seeing life explained by Carol Dweck in her book “Mindset: The New Psychology of Success” which basically divides the path to success into two mindsets: the fixed and growth mindsets. Basically, having a growth mindset is to believe that anyone can and will grow with the help of focused and consistent work. If you put a lot of time into practicing how to shoot the camera, you will see noticeable, positive results. Rome wasn’t built in a day, and the same goes for your skills. Who knows, you may be the next great photographer!
You can become a renowned photographer one day if you put in the work and dedication needed. This isn’t a race, either. Everyone should grow at a pace that is suited for them. Some people pick things up faster than most, and for those who lag behind, the important part is to keep at it as consistently as you can.
In a world where people crave for likes and shares from their peers with digital photography, a lot of aspiring photographers forget that what matters is to focus on what can actually make you grow as an artist. If you follow these tips (while picking up a few more along the way), you can and will become a great photographer.
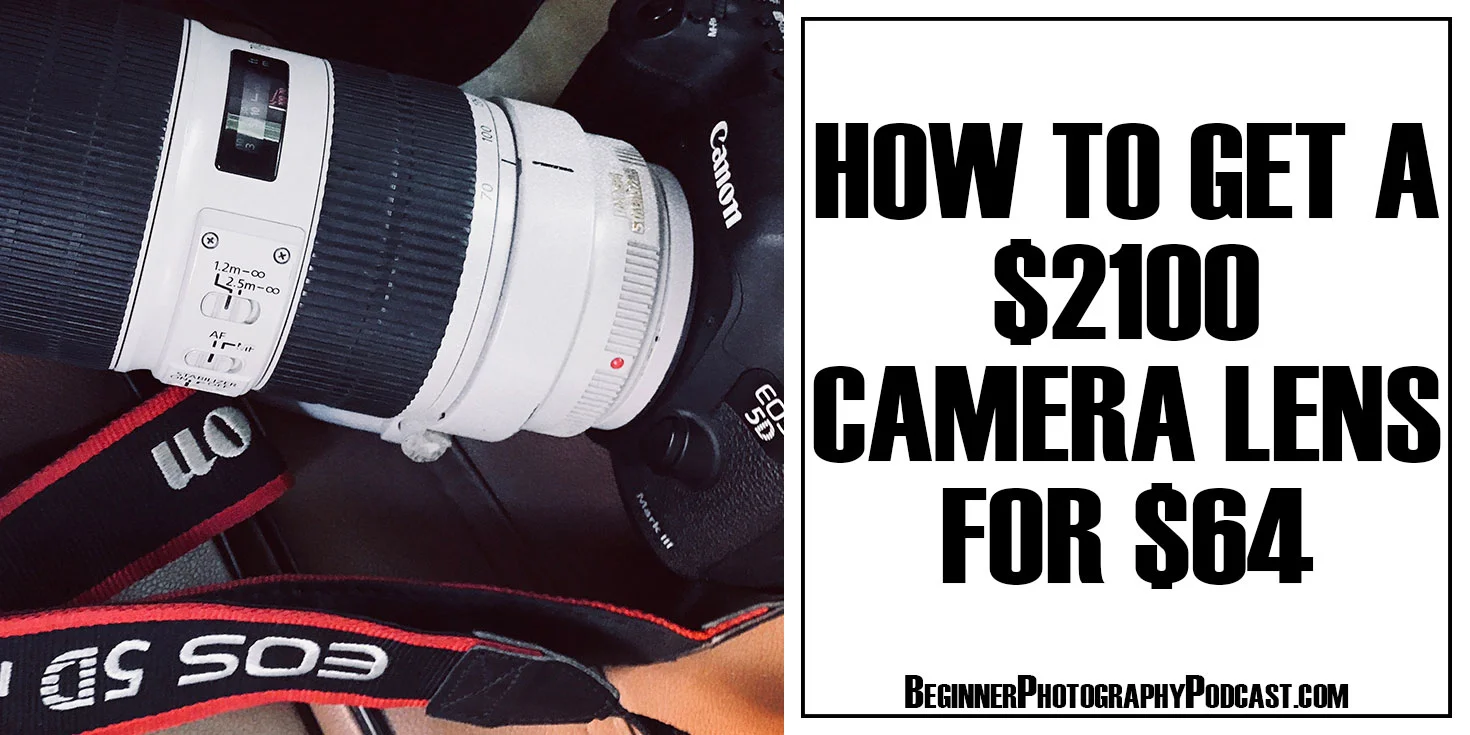
“Teach your kids photography, and they won’t have money to buy drugs”
It’s well known that photography is not cheap. Just look at any wedding photographer or sports photographers with several expensive cameras and equally expensive lenses hanging off their shoulders. Then you need speed lights and memory cards, insurance, camera bags, light stands….Ok you get! It’s not cheap to be a professional photographer.
What if you're not a professional photographer and can’t justify the price of top of the line gear? Maybe photography is your hobby or you are just starting out on your journey to become a professional photographer. What do you do about gear then?
Sometimes you need a specific piece camera lens for a job but you can’t afford to buy it.
Rent the expensive lens you’ve dreamed of for a fraction of the cost and return it when you don’t need it.
When I started to focus on shooting weddings full time, I had a list of camera lenses I needed to buy that someone mentioned in some youtube video. So I made a list.
16-35mm wide lens
24-70mm standard zoom
70-200mm telephoto zoom
A macro lens
And a fast prime lens (I already owned a 50mm 1.4 so I didn't need that on my list)
On top of that since you only have one shot at a wedding you need… Yes, NEED a backup camera body incase your main camera fails. So I priced it all out.
For ease, let’s assume you have booked 10 weddings for the year at $1000 each. (That’s a great number starting out but if you are nowhere near this number, don’t worry, neither was I my first year.)
That leaves just $1600 left at the end of the year to feed and house your family.
Next I priced what it would cost to purchase all the same gear but in Used condition and it was going to cost $5740. That’s a pretty good savings over new! But then you are missing out on a warranty if anything goes wrong with the gear, and have you seen those videos of photographers buying an expensive lens on amazon or ebay only to open the box and find a rock? No thanks!
Lastly I priced out the total cost to rent the same gear from CameraLensRentals.com
That leaves $7190 at the end of the year, that I can then use to grow my growing photography business. Ding Ding Ding!
Now let’s break this down. If I bought everything new, It would cost me $840 for each $1000 wedding I had booked, just to pay for my gear, and if I rented, it would only cost me just $281.

Well I would say the average full time wedding photographer shoots in the neighborhood of 30-35 weddings a year. To rent all that gear for 30 weddings it would cost you $8130.
Here in America, you can depreciate your gear on your business taxes for 5 years. If you were to rent all the gear for 5 years it would cost you $42,150. But only $8400 to purchase it all.
If you are just starting out and don’t have the money to own the gear, rent it if you need it. Rent it until it makes sense to buy it. If you shoot a lot of portraits or families to maybe just buy the 24-70 since you will be using it all the time, and then for weddings rent the rest.
One of the best things that happened to me through renting lenses as my wedding business grew was that I discovered that I don’t really like zoom lenses and prefer prime lenses. If I would have bought all new gear in the beginning when I SWORE I needed the zoom lenses I would have been out a ton of money when I would eventually switch to prime lenses. When renting lenses you can experiment with more creative photography or shooting style which will better prepare you for when you do go to buy!
I know how cool new gear is. I know the feeling of “If I only had this lens I could take such better photos, my clients deserve it!” But honestly clients don’t really care. They care more about the emotion in the photos and how you made them feel. So instead of spending money on buying that 70-200, spend money on building a more personal relationship with your clients. Because they will get you more business, your lens won’t.
This blog is not sponsored by Camera Lens Rentals, I just love using them and want to share them with the world! They rent Canon lenses and camera bodies like the 5D and EOS R, they rent Nikon lenses and camera bodies such as the Nikon D850, as well as rent drones. Thats cool too.
If you are interested in renting that lens that you have only dreamed of shooting with (my favorite is the canon 135mm f2) head over to CameraLensRentals.com and check them out!
I actually reached out to Camera lens rentals to see if they could give you the (Readers, Listeners, Viewers) a promo code to and they graciously agreed!
(That brings the price in my example down from $281 to just $225 saving you over $562 additional dollars over your first year!)