007: Exposure Triangle Pt3 ISO

Today we are discussing techniques for taking good photos, networking with other photographers and business ventures, as well as their own experiences, such as a rock climbing engagement shoot. They then move on to explaining the concept of ISO in relation to the exposure triangle in photography, and how it can be used to increase sensitivity to light.
The Big Idea with Time Stamps
00:06:04 Adjust ISO for lighting.
00:12:53 Use lower ISO in bright light.
00:13:20 Use lower ISO for cleaner images.
00:20:37 Increase ISO for brighter photos.
00:27:11 Shoot for cleanest image.
00:32:38 Practice changing ISO.
In Todays Episode You Will Learn:
What ISO stands for
How to visualize how ISO works
How your sensors sensitivity affects your images
Why you don't want to "Burn your steak"
What Grain is
What Grain has to do with your ISO
The balance between grain and capturing the moment.
Why high ISO performance is important
When shooting at a lower ISO is ideal
Why you shouldn't just set your ISO to a high number to set it and forget it
What Latitude is and how ISO affects it
How to change your ISO if you want a shallow depth of field
Why increasing your ISO can affect print quality
Why you didn't have the same flexibility with ISO with film as you do with digital
How to get the cleanest image
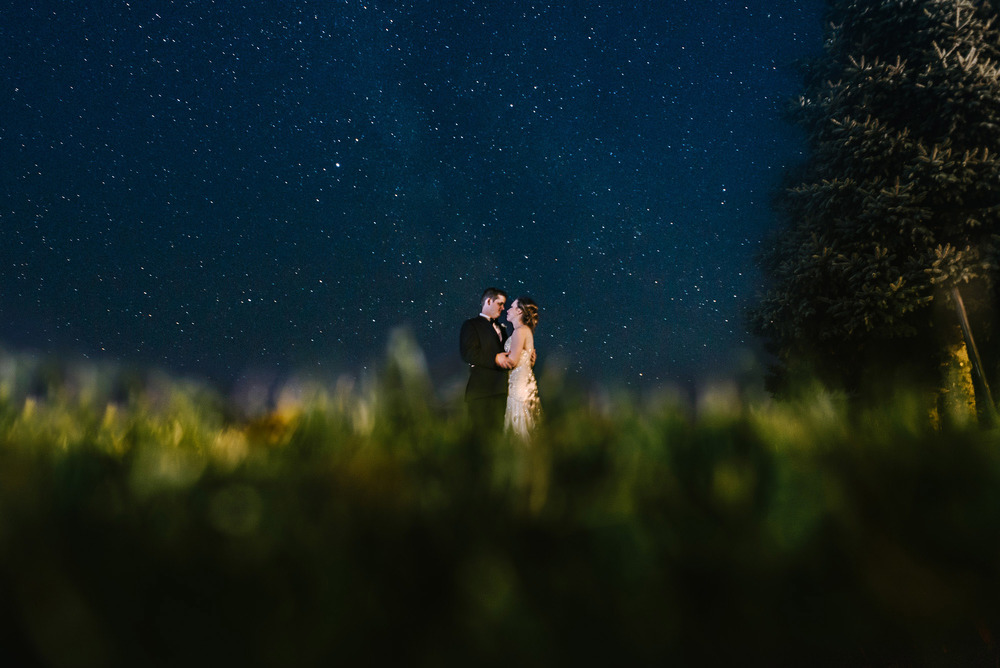
We share examples of High ISO shots that saved the day

TOP: ISO 1250 with Off camera flash
BOTTOM: ISO 8000 no Off camera flash
The bottom photo is nowhere near as well exposed as the top photo but the point here is that the moment will always win. The couple are laughing together and having a great time. Even though the off camera flash made traditional photos more compelling, don't be scared of boosting your ISO to get the shot!
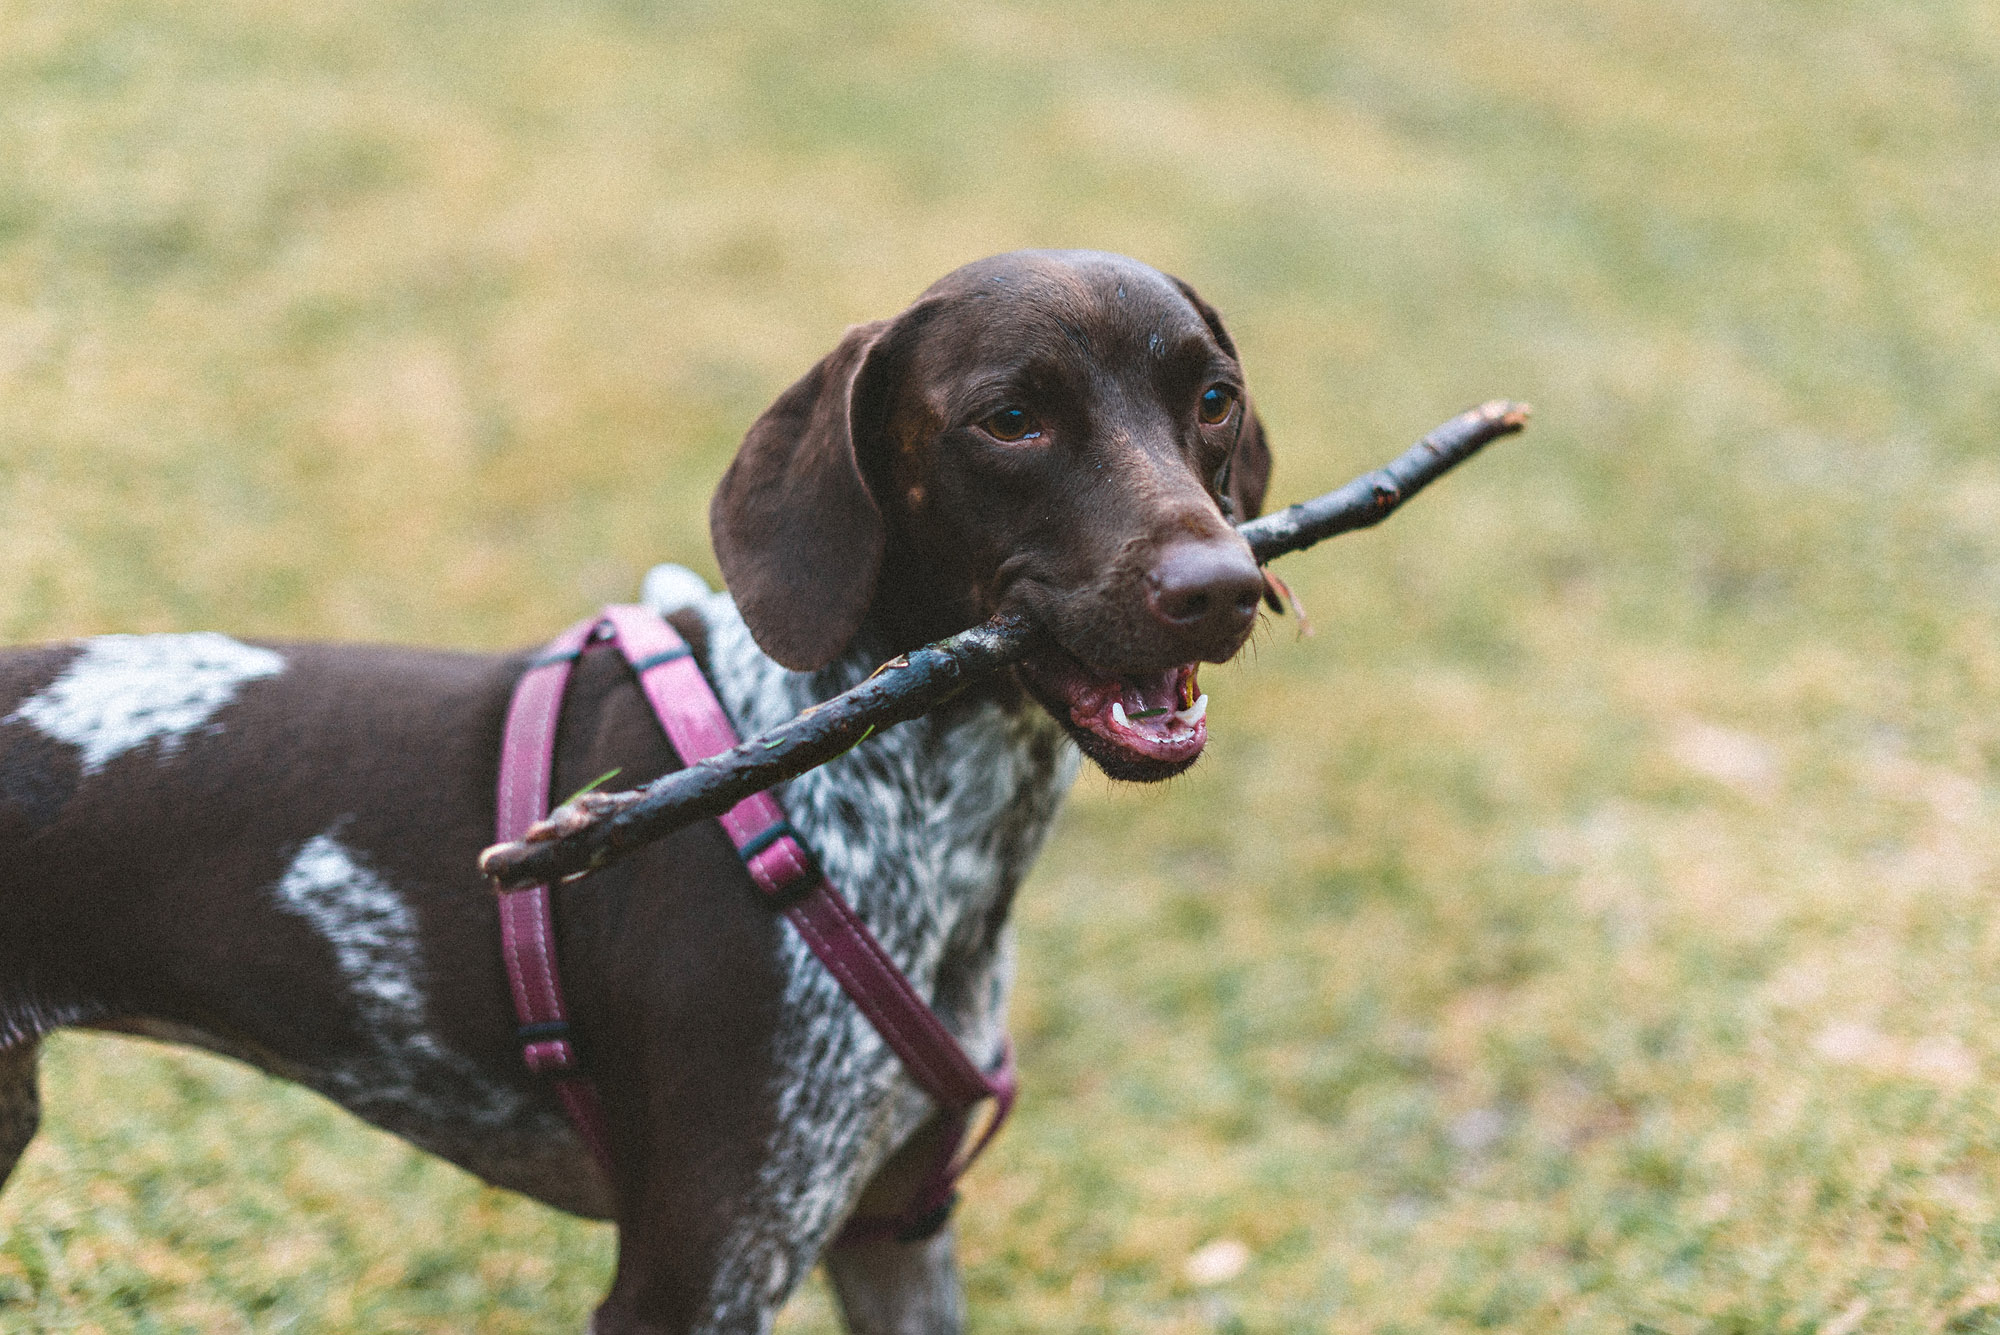
Top: ISO 800
Bottom: ISO 6400
As Promised.

ISO 8000
Wrap-up:
ISO is one part of the very important exposure triangle that we have been chatting about the last few weeks; ISO in its essence is the sensitivity of the digital sensor and how much light it will allow the sensors to create a digital negative from. The lower the ISO (ISO 100/200/400) the less light, and the higher the ISO (1600/3200/6400) the more light it will allow.
As you introduce higher ISO sensitivities to the camera while photographing, you also introduce a couple of potential risks: the possibility of more grain, the possibility of , overexposing the image beyond use. If you keep your ISO too low, it might return completely black images.
Pro-tip:
When I am shooting indoors without any really good light coming from windows, we generally start our ISO at 1000 to get a feel. From there I will adjust until I get it JUST right.
Weekly Lesson:
As you become more comfortable with photographing different lighting situations, try sitting in rooms and guessing what you think the Aperture, ISO, and shutter speed. Double check with your camera, write it down and then try again in another room. Eventually you will become better at "spot checking" your exposure.
And most importantly, don't forget to have FUN. Photography, even if you're a beginner, is all about having FUN.
If you have any questions Feel free to email us today at
BeginnerPhotographyPodcast@gmail.com
Connect with us on Facebook!
www.facebook.com/beginnerphotographypodcast/
Adjust ISO for light sensitivity.
When it comes to photography, adjusting the ISO is an important part of capturing the perfect image. ISO, which stands for International Organization for Standardization, is the amount of power given to a camera’s sensor to increase its sensitivity to light. In other words, ISO is like blinds on a window. When the blinds are closed, not much light is getting through but you can still see that it’s light outside.
The ISO setting on a camera affects the light sensitivity of the sensor. Higher ISO settings will make the sensor more sensitive to light, while lower settings will make it less sensitive. It’s important to remember that the higher the ISO, the more noise or grain you will get in your photos. This means that if you want to capture a low-light scene with minimal noise, you should opt for a lower ISO setting.
When adjusting the ISO, it’s important to consider the other two main settings of the exposure triangle: aperture and shutter speed. Aperture is the size of the opening in the lens through which light enters the camera. Shutter speed is how long the shutter is open to allow light to enter the camera. Increasing the ISO will allow you to use a faster shutter speed and/or a smaller aperture, which can be useful in situations where you don’t have much light available.
When adjusting the ISO, it’s important to remember that the higher the ISO, the more noise or grain you will get in your photos. This means that if you want to capture a low-light scene with minimal noise, you should opt for a lower ISO setting. Additionally, it’s important to consider the other two main settings of the exposure triangle: aperture and shutter speed. Increasing the ISO will allow you to use a faster shutter speed and/or a smaller aperture, which can be useful in situations where you don’t have much light available.
In conclusion, adjusting the ISO is an important part of capturing the perfect image. It’s important to remember that the higher the ISO, the more noise or grain you will get in your photos. Additionally, it’s important to consider the other two main settings of the exposure triangle: aperture and shutter speed. Increasing the ISO will allow you to use a faster shutter speed and/or a smaller aperture, which can be useful in situations where you don’t have much
Use lower ISO in bright light.
When it comes to controlling the amount of light that is captured in a photograph, ISO is one of the most important settings. The ISO setting determines how sensitive the camera’s sensor is to light. A low ISO setting is best for bright light, as it will allow the sensor to capture more detail and be less susceptible to noise.
When shooting in bright light, it is best to use a low ISO setting. This will give you the best possible image quality, as the sensor will be less sensitive and therefore less prone to noise. Additionally, a low ISO setting will allow you to use a slower shutter speed, which can be beneficial in situations where you want to capture motion blur. For example, if you are photographing a waterfall, a slow shutter speed can help to capture the movement of the water.
Another benefit of using a lower ISO in bright light is that it will allow you to use a wider aperture. This will give you a greater depth of field, which is beneficial when you want to capture multiple subjects in focus. Additionally, a wider aperture will give you a brighter image, as more light is being let into the camera.
Finally, it is important to remember that a higher ISO setting can be beneficial in low light situations. A higher ISO setting will allow you to use a faster shutter speed, which can be beneficial when you want to freeze action. Additionally, a higher ISO setting can be beneficial when shooting in low light, as it will make the image brighter.
In conclusion, adjusting the ISO is an important part of capturing the perfect image. It’s important to remember that the higher the ISO, the more noise or grain you will get in your photos. Additionally, it’s important to consider the other two main settings of the exposure triangle: aperture and shutter speed. Increasing the ISO will allow you to use a faster shutter speed and/or a smaller aperture, which can be useful in situations where you don’t have much light. However, it is important to remember that using a lower ISO in bright light will give you the best possible image quality.
Set ISO for clean image quality.
When it comes to setting the ISO for clean image quality, it is important to understand that the higher the ISO, the more noise or grain you will get in your photos. A high ISO is useful in low light situations, but it is important to remember that using a lower ISO in bright light will give you the best possible image quality. Additionally, it is important to consider the other two main settings of the exposure triangle: aperture and shutter speed. Increasing the ISO will allow you to use a faster shutter speed and/or a smaller aperture, which can be useful in situations where you don’t have much light.
For example, when shooting in bright light, it is best to keep the ISO as low as possible. This will ensure that the image is clean and free of noise. Additionally, when shooting in low light, it is best to increase the ISO to a higher level. This will allow you to use a faster shutter speed and/or a smaller aperture, which will help you capture the image.
In conclusion, adjusting the ISO is an important part of capturing the perfect image. It’s important to remember that the higher the ISO, the more noise or grain you will get in your photos. Additionally, it’s important to consider the other two main settings of the exposure triangle: aperture and shutter speed. Increasing the ISO will allow you to use a faster shutter speed and/or a smaller aperture, which can be useful in situations where you don’t have much light. However, it is important to remember that using a lower ISO in bright light will give you the best possible image quality.
Higher ISO = better photos.
The digital age of photography has made it possible to take great photos with higher ISO settings than ever before. With advances in technology, it is now possible to get a properly exposed image at ISO 1200 or higher, depending on the lens and steadiness of the hand. This means that photographers can now take advantage of the higher ISO settings to get faster shutter speeds and smaller apertures, allowing them to capture beautiful images with more detail and clarity.
Although film photography still has its place, digital photography has made it easier to adjust the ISO settings to get the desired results. With digital photography, it is possible to adjust the ISO quickly and easily to get the desired results. This is especially useful in situations where the light is changing quickly, such as during sunrise or sunset. Additionally, digital photography makes it possible to take photos with a wide range of ISO settings, from low to high, without having to empty out the roll of film.
No matter which type of photography you prefer, it is important to understand the importance of adjusting the ISO settings to get the best possible image quality. Whether you are shooting with film or digital, adjusting the ISO can make a big difference in the quality of your photos. With digital photography, it is easier than ever to adjust the ISO settings to get the desired results. With the right settings, it is possible to get beautiful photos with a wide range of ISO settings, from low to high.
Learn to adjust ISO.
ISO stands for International Organization for Standardization and is the measure of how sensitive your camera is to light. The higher the ISO, the more sensitive the camera is to light, and the lower the ISO, the less sensitive it is. The higher the ISO, the more noise you can expect in your photos. The lower the ISO, the less noise there will be.
When shooting in low light, it is important to adjust the ISO setting to get the best possible results. The higher the ISO, the more light your camera will be able to capture, allowing you to get the shot you want. However, it is important to remember that the higher the ISO, the more noise you can expect in your photos. If you are shooting in a low light situation and want to avoid noise, it is best to keep the ISO as low as possible.
On the other hand, if you are shooting in bright light, it is best to keep the ISO settings low. This will help to reduce the amount of noise in your photos. It is also important to remember that the lower the ISO, the less detail you will be able to capture in your photos. This is why it is important to adjust the ISO settings depending on the light conditions.
No matter what type of photography you are doing, it is important to learn how to adjust the ISO settings to get the best possible results. With a little practice, it is possible to get beautiful photos with a wide range of ISO settings. Once you have mastered the basics of adjusting the ISO, you will be able to get stunning photos in any light condition.
Practice changing ISO.
ISO stands for International Standards Organization and is used to measure the sensitivity of a camera's sensor to light. The higher the ISO, the more sensitive the camera is to light, and the lower the ISO, the less sensitive the camera is to light. When adjusting the ISO, it is important to remember that higher ISO settings will result in a brighter image, but the image will also be more noisy. On the other hand, lower ISO settings will result in a darker image, but the image will also be less noisy.
When learning to adjust the ISO, it is important to experiment with different settings to see what works best for you. You may find that you are comfortable with a higher ISO setting, which will allow you to capture great images in any light condition. Alternatively, you may find that a lower ISO setting works better for you, allowing you to get beautiful images in brighter conditions.
No matter what ISO settings you decide to use, it is important to remember that the more you practice, the better photographer you will become. By taking the time to experiment with different ISO settings, you will become more familiar with how they work and be able to use them to get the best possible results. So don’t be afraid to try out different ISO settings and see what you are comfortable with. You may be surprised by the results.